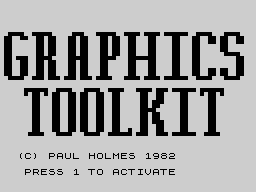
Graphics Toolkit
Utility: Graphics · ZX81 16K · 1 players · English
1982
Discussion
Nobody has started a thread about this yet.
Releases
- 1982publisher not recorded
- 1982JRS Software LtdPound sterling 5.95
Play
- DEMO-GR-.ZIPZX81 archive file English1 KB
- GRAPHICT.ZIPZX81 archive file English2 KB
- GRAPHTOO.ZIPZX81 archive file English1 KB
Files and rights
Distribution permission is on record, granted to another archive rather than to this one. Screens and pictures are copied here; everything else links to the archive that holds it.
- AllowedJRS Software Ltd → WorldOfSpectrum
Credits
- Paul Holmescredited
Sign in to credit somebody, or say what these people did.
In the magazines 8
ZX Computing #3Oct 1982 · p.124
A PICTURE IS WORTH A THOUSAND WORDS A number of 'tool kits' are available to make it possible to write better programs on the ZX81. ZX Computing staff look at two of them, Screen Kit 1 from Picturesque and Graphics Toolkit from JRS Software. Screen Kit 1 is an attractively packaged screen toolkit from 'Picturesque' sold by mail order for £5.70. It consists of a number of machine code routines to help a ZX81 user smarten up his graphics in a BASIC program. The cassette inlay and instruction card are tidily presented in blue, well printed and easy to read. From its smart appearance I assumed it would LOAD first time but I was not so lucky. On playing back the tape through the loud speaker I discovered the signal was a little noisy and not recorded at a sufficiently loud volume. After wedging a small piece of paper under the cassette(!) and setting the highest volume level on my cassette recorder it LOADed easily. Screen Kit 1 has eight facilities four-way scrolls; CLS; Borders; CPS; Reverse; Cursors; Memory and SAVE/LOAD. The SAVE and LOAD facilities are perhaps the most useful, being at double speed. All the routines are accessed from BASIC via USR statements & POKE commands. The instruction card is A4 size, double sided and folded in half with compressed text printed in Black. In this way Picturesque have managed to get some pretty comprehensive and detailed instructions onto a single sheet. The first four commands scroll the screen in the appropriate direction. One POKE adjusts how many scrolls will be actioned before returning to BASIC. For instance, to scroll the screen five times to the left simply POKE 16661,5 then RAND USR 16660. The unfortunate thing about the scrolls in Screen Kit 1 is that they do not wrap-around ie the characters lost at the edges of the screen do not reappear at the opposite edge. Wrap-around scrolls are far more useful in that you can do continuous backgrounds that are constantly moving but do not need to be updated because it wraps around the screen. The principal is quite similar to a 1920s westerns where the Sheriff would run on a conveyor belt and behind him would be the background painted on a giant canvas sheet that would be rotated like a belt (thus one always saw the same scenery go past again and again!) CLEARLY CRASHED Screen Kit 1 also provides a CLS facility which can be used to overcome the slowness of the ROM's routine. Instead of the usually slow CLS where the characters can be seen to be changed spaces from top to bottom, the Picturesque CLS is good, instant clear screen which is far tidier, CLS also has a second use. If you poke 16863 with a character code, that character will be used instead of spaces in the CLS routine. Unfortunately Screen Kit 1 has no error checking routine at all so if you POKE an invalid character code into 16863 and then access the CLS routine then the program crashes. This sort of defect can be very annoying and doesn't show a very thorough approach to the product. The BORDERS routine is quite impressive in that it is a fast way of drawing boxes on the screen. You have to specify the line and column position of the top left hand corner and also the height and width inside the border. This requires four POKES which is really quite a lot of typing for a single command. CPS is simply a CLS for a specified part of the screen, the POKEs are the same as those used in the Border command. Clearing part of the screen is not something that is a vital aid to the Graphics programmer. It does have its uses but not that many. The next command is a useful function. It changes part of the screen into inverse video, which in loop would make a very straightforward way of highlighting areas of the screen but for the five lines of BASIC code required every time this operation is needed. The next command is called CURSOR and here is a quote from the manual: "Simulates INPUT, but gives you a flashing cursor". What actually happens is that it flashes a black blob on the screen which disappears when a key is pressed. The character code of the key pressed is returned. To say that it simulates INPUT is not quite accurate; more correctly, it could be described as INKEY$ with flashing blob! Typing PRINT USR 16886 returns a figure which is the free memory in bytes. The SAVE & LOAD routines are the most useful part of the package. They operate at double speed and are used for storage of variables on tape. No file names are allowed so that rules out a tape filing system for a database program, where it could load up a selected file from, say, twenty on one tape. This is a pity since the double speed SAVE & LOAD in their machine code monitor 'ZC-MC allow single letter file names. When I tried the routines for Sinclair's SAVE 6 LOAD and a similar pattern appeared on the screen, except the bars were narrower. The SAVE & LOAD routines are a reason to buy the package in themselves. PLOTTNG POWER The SAVE and LOAD routines are very good and very useful, being at double speed for the variables, but bear little relation to the title Screen Kit 1. Perhaps they should have called it 'Programmers: toolkit'. As Screen Kit 1 is stored in a REM statement it becomes part of your program, which has the advantage that it doesn't need to be loaded above RAMTOP every time you want to use it. But it does mean that if you start writing a program and decide you need Screen Kit 1 and haven't already LOADed it, then to merge it with your own program is a very complicated process described in 27 steps in the instructions. Despite this, it is a very useful package overall, and one which will enable you to produce much more professional looking programs. GRAPHIC TOOLKIT Graphics Toolkit is sold by mail order from JRS Software at a cost of £5.95. This includes VAT and Postage. Like Screen Kit 1, it consists of a number of machine code routines to help the BASIC programmer smarten up his graphics. The cassette is a studio produced type and the quality is of a good standard because the signal is 'processed' by the studio. The packaging is not as smart as that of Picturesque, but the instructions consist of two sheets of double sided, compressed A4 as opposed to one. They go to the same depth as Picturesque's instructions but cover an extra eleven functions. Graphics Toolkit has twenty three routines: DRAW FOREGROUND ON BORDER FILL UP LEFT EDITPRINT DOWNSCROLL RIGHTSCROLL OFFSCREEN BACKGROUND OFF SQUARE UNDRAW FOREGROUND OFF UNBORDER REVERSE DOWN RIGHT UPSCROLL LEFTSCROLL ONSCREEN BACKGROUND ON SEARCH & REPLACE The most powerful and useful feature is the DRAW command. It allows the user to define a multi-character shape in a REM statement and then DRAW or UNDRAW it at any point on the screen. It will draw a shape of any size instantly and so is ideal where fast moving graphics are required. The shape is defined in a REM using characters, (the ones to be printed), and direction codes (to indicate where each character is to be placed). For instance, to define a simple square: 10 REM A SQUARE: The user may place his own label first (in this case it is 'A SQUARE') then there is a colon to tell Graphics Toolkit that the definition is starting. Then comes the first character, followed by a < (greater than) indicating that the next character is to be placed to the right of the previous one. A less than sign means move left, a 'V' means move down and an 'A' means move up. The FOREGROUND ON/OFF facility provides an added effect when used with DRAW & UNDRAW. When foreground mode is on, the shapes that are moved around the screen appear to move behind graphics already on the screen. A demonstration is provided on the cassette, in which a predefined snake moves behind a cactus. Any number of shapes can be defined and used because one POKE before the DRAW command sets the line number of the appropriate shape. The BORDER command is not the same as the Screen Kit. Instead of drawing a one pixel wide border anywhere on the screen, it draws an instant border around the edge of the screen using any character. Only the bottom line position is variable. This is so you have the choice of using all 24 lines of the screen or leaving the bottom two free as a sort of 'text window'. UNBORDER simply removes the border. EDITPRINT allows you to use that window; it moves the print position to the top edit line which is normally inaccessible from PRINT. GIVING GROUND FILL does exactly what it says. It fills a portion of the screen with a chosen character. The user, by way of two POKEs decides the line to start filling from and how many lines to fill. On this, as on all commands there is full error checking so that if you try to use an invalid character or FILL off the bottom of the screen it gives an error code in the usual format Code/Line No. An actual error message system would have been more helpful but codes are better than nothing. REVERSE is similar to Screen Kit 1 's command of the same name, in that it changes part of the screen to inverse Video. FOREGROUND mode affects both FILL & REVERSE; if Foreground mode is on, only Foreground characters will be changed. Foreground characters count as anything which isn't a Background character. Sounds confusing, doesn't it? Background is set by BACKGROUND ON. This clears the screen to character of your choice and selects it as your Background. That is similar to the PAPER system on the Spectrum. The Foreground characters can be anything else. For instance, you have 30 inverse asterisks randomly placed on the screen, the Background being fullstops. When a REVERSE command is done with Foreground on, the asterisks will be changed to ordinary asterisks but the fullstops would be left unchanged. The Scrolls wrap-around the screen, making some interesting effects possible. I created the effect of moving through space by randomly printing fullstops on the screen, REVERSEing the whole screen and then just repeatedly DOWNSCROLLing it, ideal for a space game! An interesting facility is ONSCREEN & OFFSCREEN. They turn the screen on and off respectively, not as in FAST mode but by a clever technique which uses no extra memory. As they are instant, the screen can be flashed in a loop to give a quite stunning effect. SEARCH & REPLACE searches on the screen for a chosen character and replaces it with another character. This would take quite sometime in BASIC but with Graphics Toolkit it operates immediately. The uses of this are not obvious, nor varied, but really depend on the user's imagination. SQUARE is quite similar to Screen Kit 1 's BORDER command but far slower. CONCLUSION Graphics Toolkit has far more routines than Screen Kit 1 but lacks double speed LOAD & SAVE. Good value at £5.95.
Advert7
- Sinclair User #8Nov 1982 · p.54
- Sinclair User #7Oct 1982 · p.24
- Sinclair User #6Sep 1982 · p.40
- Sinclair User #5Aug 1982 · p.58
- Sinclair User #4Jul 1982 · p.60
- Sinclair User #3Jun 1982 · p.54
- Sinclair User #2May 1982 · p.39
Related
- Elsewhere
- ZX81 StuffZX81 Stuff
- Same entry at
- Spectrum ComputingZXInfo
Reviews from people here
Sign in to write about this, or make an account. It takes a minute and lets you correct the catalogue too.
No description, tag recorded.
Sign in to correct or add to this.
Hold the rights to this and want it taken down?