Paintbox
Utility: Graphics · ZX-Spectrum 48K · 1 players · English
Print'n'Plotter Products Ltd · 1983 · Pound sterling 7.50
Paintbox, 1 of 2
Discussion
Nobody has started a thread about this yet.
- Control Option
- Cursor
Releases
- 1983Print'n'Plotter Products LtdPound sterling 7.50
- 1983Erbe Software S.A.
Play
- Paintbox.tzx.zipTape image English22 KB
- Paintbox.tap.zipTape image English8 KB
Documents
- Paintbox(EN).pdfInstructions English1,093 KB
Files and rights
No permission is on record either way. Screens and pictures are copied here on a take-down basis: if you hold the rights and want something removed, say so and it goes.
Credits
- Joe Gillespiecredited
Sign in to credit somebody, or say what these people did.
Scores
In the magazines
- Sinclair User #251984 · Gilbert Factor8/10
Elsewhere on the web
- WorldOfSpectrum 2 votes8.00
In the magazines 51
ZX Computing #15Oct 1984 · p.83
Colin Christmas
DESIGNS FOR LIVING Colin Christmas tkaes a further look at computer art. Still hooked on Graphics? Well don't be afraid to admit it, some of us addicts are often mistaken for respectable members of society, and some of us are regular readers of ZX Computing. And while we're on the subject, it's worth a reminder to check back over the past three or four issues of the magazine to see just how much there is to be getting on with for the more enthusiastic programmer who really wants to come to grips with the theoretical and technical aspects of using the graphics and design potential of the micro. I have great respect and admiration for such enthusiasts, If I wore one, I'd raise my hat to them. I don't, so this vote of thanks will have to do. Other enthusiasts such as myself tend to start about half way through the process. In other words, when most of the hard work has been done and the programs and the hardware have been produced. Lazy? Incompetent? Possibly, but it takes all sorts. In the last issue I looked at the growing potential of graphics pads generally and of the RD Digital Tracer and Dream Software's CAD package specifically with reference to graphics and design work. However two other, more established "tools" for the graphics design specialist also merit serious consideration. LA PLUME DE MA MICRO Light pens for use by Micro users have been around for a long time now. Opinions as to their usefulness and value for money vary of course. Recently I've been using the LIGHT PEN produced by DK'TRONICS for the 16 and 48K Spectrum. The package consists of a program on cassette, an instruction booklet, the pen itself and a control interface which is plugged into the back of the computer. The interface is compact and well designed and fits neatly and reassuringly into the port. The metre long lead from the pen is fitted with a jackplug which plugs firmly into a socket located on the top of the interface housing. The booklet in fact is one of the best I've seen. It is informative, brief, easy to follow and includes a section at the end on "error conditions" which might be encountered. The program contains several routines which enable the user to select from sixteen functions. These are displayed as a menu on the bottom two lines of the screen. This means the drawing area is always clear. In order to select a function once the program has been loaded you simply point the pen at the letter or box displayed on the menu and press any key. This is made possible by a machine code routine, one of the several provided. The program uses two variables called "origin" and "target" which need to be positioned on the screen in order to determine the co-ordinates required for drawing lines, corners of boxes, centres and circumferences of circles, define arcs and so on. The full menu also enables the user to erase the line, circle, box or whatever has just been drawn, to ink in shapes, to set border, ink and paper colour, to draw freehand and to clear the screen. Screens can be SAVED or LOADed from tape or can be kept in memory for later recall. Text can also be inserted into the display. Several of the functions require definite steps which must be followed before the command can be carried out. These are well laid out in the instruction manual. At first it seems as if these separate steps are going to prove tedious and cumbersome but it is surprising how quickly one becomes familiar with them. SET UP Some people will also find the calibration routine at the beginning of the program annoying. The brightness, contrast and colour controls of the T.V. set they are using may have to be adjusted before the pen can be positioned accurately. I've tried the pen with a Black and White set and this only seems to treble the problems of calibration. I have to confess that I pronounced it's use with Black and White set more nuisance than it was worth. One last piece of advice, when using a lightpen give some thought to where you position your micro in relation to your screen. Ideally it should go underneath the screen or beside it, for most of us on the left. Remember that your main working area is the screen itself and you need to be able to work there freely and without developing arm strain. High marks then for one of the most recent lightpens to come onto the market. Something I neglected to say is that it has so far proved to be very reliable. Not so I'm afraid with another lightpen I've been trying to use, the TROJAN. I've read elsewhere that there were probelms of compatibility with the early TROJAN Lightpens and the newer Spectrums. I'm assured that I've got one of the new lightpens. Sorry, Trojan Products, but mine has been giving me grey hairs just where they are not welcome - in amongst the few I've already got. The most common problem being that the program seems to jump between commands or to stick in commands. At best erratic and unreliable, at worst, it seems to crash. THE SOFTWARE SOLUTION A Utility which has also been with us for a while now but which is still capable of straining the imagination is PAINTBOX from PRINT 'N' PLOTTER PRODUCTS. Again, it's now only one of the many Graphics packages available from the Spectrum but it's certainly worth serious consideration nevertheless. It claims to be "ingenious", "unique", "the most imaginative." in the cold light of the monitor screen may I offer Impressive and Comprehensive as more critical alternatives? This graphics programming tool-kit for the 48K Spectrum consists of a cassette containing two programs, one on each side. One to demonstrate some of the results which can be achieved. The other with the machine code program which enables you to do all the work. There is also a twenty eight page book to take you through this supermarket of graphics 'deals', it contains a lot of detail and the print is small. Working through it is not easy but it is written well and conveys real excitement and enthusiasm for the tasks involved. In the end it's a smooth ride and it gets easier to use. The main menu, as you would expect, is displayed once the program is loaded. Before you move on you have a choice of cursor control, keyboard or Kempston Joystick, although other joysticks may be used. If you then choose Menu 1 - most Games enthusiasts do, you can explore the UDG Editor. Without affecting the normal character set you can program up to 84 user definable characters and locate this set into your own written programs. This is made possible by storing 4 Banks of characters in memory and recalling them at any time into the usual UDG area by a built in short machine code routine. There is of course a facility of both saving all four banks to tape and loading pre-recorded banks. Sketch Pad, next off the main menu, puts on the screen a small 'try out' area for related characters before they are used in screen graphics or programs. The current UDG file appears at the top of the screen. FOOD FOR THOUGHT As you continue to work through the Menu like some gourmet in a great restaurant, you discover how to define any or all of the 84 characters available and put them in position, then put them into your own programs. High resolution screen graphic work can be attempted using the Precision Plotter section of the program. The format will be familiar. Plot, draw, fill. erase, circle, radials and arc, together with choice of ink, cursor and with some difficulty paper colour. The cursor moves smoothly and quite quickly as you work. However, sometimes it is useful to be able to move the cursor with great precision and accuracy. This also is possible by keeping the SHIFT key pressed during movement. I was very impressed with the action and ease with which one could wrk with this section. Moving on quickly, the rest of the program offers a Screen Planner where your graphics produced using Precision Plotter can be combined with the UDG's you defined and stored in any or all of the four UDG Banks. Procedures are given for achieving Multiple Screen Files. A short machine code routine, used as a memory file, when called transfers data to the screen as a picture. This data call can be held permanently above RAMTOP and called at any time. Impressive and comprehensive, it is a fairly powerful Graphics aid, above all, it is fun to use and experiment with. The more you use it, the bolder and more adventurous you become. STATE OF THE ART It is usual to talk of exploring the potential of our micros when discussing the hardware and software available for say Graphics and Design. It seems to me that together they offer a challenge to us, the users, to explore our own potential to make, create and design. A challenge not our powers of logical thinking or convergence thinking, but to our powers of divergent thinking. As users it's up to us to take up the challenge. What can we achieve, making use of lightpens, tracers graphics tool-kits and so on? It's difficult trying to imagine a young Leonardo da Vinci sitting down with paper, canvas, pens, inks, brushes and paints sucking his thumb and wondering, "Well what do they expect me to do with this lot? " There may not be many Leonardos amongst us, but the challenge remains. What CAN we do with this lot? And I don't just mean Games.........
Your Spectrum #8Oct 1984 · p.37
Peter Freebrey
ART FOR ART'S SAKE There are many graphics toolkits available on the market, each claiming to give the Spectrum the commands it needs to become a 'true' artist. Peter Freebrey finds out if they left the drawing board too soon... Many of the programs now available for the Spectrum have quite amazing title pages and graphics within the program. But, wonder not, for with a fair amount of preparation and care, you too can produce similar effects. That's where graphics toolkits come in. They appear in a number of different guises, but the main reason for our interest is that they all cut down the level of work involved in creating a picture on the screen. They fall into one of two main kinds - those that enable you to draw lines, shapes, blocks of colour and dots anywhere on the screen, and those that provide a simple way of creating your own user-defined graphics; some of these toolkits provide both within the one package. Judging packages against one another is no easy task - because each of the better utilities offers something that the others don't. Either one has to wait for a package that includes all the facilities listed here (unlikely), or else you'll have to choose the one that offers what seems most suited to your present needs. In fact, there's a great deal to be said for having more than one toolkit; that way, with a little care, you can always SAVE from one and LOAD into another - perhaps to take advantage of a specially needed routine. 48K MELBOURNE DRAW Melbourne House £14.95 Although one or two graphics toolkits had appeared before this one was launched, none ever got the widespread publicity of this particular package. Melbourne Draw has now had well over a year to make its mark and it's gained the reputation of being a most effective utility. LOAD it and the program will auto-RUN and display the main menu. This offers several options enabling you to LOAD previously developed pictures or user-defined graphics (UDGs), edit a picture, and also to SAVE and VERIFY. Select 'edit picture' and you're presented with a black screen area - plus a two-line information window at the bottom of the screen. This tells you the current 'mode' (Skip, Set, Reset, Invert, Scroll or Text); you're also told whether you are editing 'screen' or 'attributes'. Below these are two numbers representing the x and y coordinates of the cursor. The numbering system used is identical to that of the Basic PLOT command, even allowing access to the bottom two lines of the screen (so that the bottom left corner coordinates are x=0, y=-16); should you wish to use these two lines, the information window can be moved to the top of the screen. During a Fill command, the window is removed to allow complete filling of any shapes within the window area. To the right of mode and co-ordinates is a four-character block, indicating the degree of magnification you are using. Finally, to the right of this is the section indicating the current INK, PAPER and attribute information. The first step is to clear the screen... that way you can see what you're doing! 'Clear' options (Paper, Ink, Both, Screen, All or None) are activated by Shift (either Caps or Symbol) and the 'R' key. Generally Melbourne Draw is pretty user friendly, although initially, with all the commands to remember, it may seem otherwise! But even then there is help because Melbourne has thoughtfully listed all the commands and their actions on the back cover of the instruction booklet... yes, it's definitely user friendly. Once you've cleared the screen you'll be left with a one-pixel flashing cursor that's roughly in the middle of the work area. This can be moved in any of eight directions using the block of keys under 'Q-W-E'. Pressing Enter will implement the Set mode and if you now move the cursor, a line will be drawn on the screen. Space activates Skip mode - no pixels set; the 'O' key lets you Reset pixels you've Set by mistake. Pressing the 'G' key puts a grid pattern over the screen, enabling you to align any shapes with attribute cells (you may wish to colour consecutive cells differently). The 'M' key magnifies your working image two times, and pressing 'M' again gives you another two-times magnification. This is particularly useful for fine detail and it's also very handy when you're designing UDGs. Melbourne Draw has the novel facility of allowing you to convert any character square (shown by the 'grid' pattern) to a UDG (normally restricted to the Spectrum allocation of keys 'a' to 'u'). Thus, at maximum magnification you have a display of eight by five cells showing. You can create a picture on it and conconvert 21 cells to UDGs, either for use elsewhere in your picture or for use within other programs. You're also given the data for each, should you want to record it for future use. The user can scroll the display in any direction and print text to any character square. The direction that the text is printed can be rotated; that means if you want a word reading down the screen with the letters on their sides, there's no awkward positioning to deal with. Just specify the direction in which text is to be written and key in your characters; UDGs can be dealt with in the same way. Finally, the display can be reversed left to right. Side two of the cassette has several Melbourne House title pages for you to LOAD, alter and otherwise play/learn from. PAINTBOX Print 'N' Plotter Products £9.95 LOAD Paintbox and it'll autoRUN to display the main menu. This serves up a choice of three options: UDG Editor, Precision Plotter and Screen Planner. Opt for UDG Editor and you're given a further menu which allows you to view existing UDGs, create new UDGs (using Paintbox's Drawing Board) or to go to Sketch Pad. Other options allow for LOAD or SAVE of UDGs from/to tape, the final one being to return to the main menu. Option 1 - View UDG Banks - displays four sets of UDGs already in memory; you can choose one of these for use with further options. The four banks are (a) a submarine, (b) a warship, (c) aircraft and (d) buildings, trees and vehicles. Also displayed are any UDGs you've already created using option 2 - Drawing Board. This gives you an eight by eight box within which to create your own UDG characters; you can call from one of the banks of UDGs, or you can call a keyboard character and alter that. Designs can be drawn using either the cursor keys or a Kempston Joystick. Once you ve opted to call a character to create or alter, there's no return... you must then create something, even if it's only a space; there's no way you can break out of this part of the program. Having produced your character, you're then given the opportunity of creating an inverse copy, a mirror image - or even of rotating it through 90 degree steps; whatever it is, just file the result in the bank of UDGs you're working with. There are four banks of 21 UDGs, so it's possible to create a total of 84 different graphic designs; the instructions tell you all you need to know about using banks of UDGs within your own Basic programs. The Sketch Pad option gives you a six by 30 cell (work area) together with a display of existing UDGs. Here you can try various combinations of UDGs (out of any bank of 21) to see what they look like; if you're planning to use several linked together, make sure they're in the same bank! The next selection from main menu is the Precision Plotter. You're given the choice of keyboard cursor keys or, again, the Kempston Joystick, and from there you can either start from a blank screen or LOAD a previous file from tape. First choose INK and PAPER colours - then the decision is yours whether to create a new picture, or return to one held in memory. The cursor keys give movement in four directions. Key 'Q' PLOTs a single pixel point and 'W' DRAWs a line from the end of a previous line or pixel point plotted; key 'E' will Erase the last command and 'F' will Fill with the current INK colour. Fill often misses out portions of the screen so you may have to recall it to fill in the 'holes'. Paintbox also supports Circle ('H') and Arc ('A'). INK colour can be changed at any time but PAPER has to be chosen at the time you first enter Precision Plotter. Over ('N') can be useful for correcting minor mistakes and there's a choice of cursor size - cross hairs for general use and a much smaller, single pixel, for precision work. Shift plus cursor keys moves the cursor at a much slower rate - again for fine, careful positioning. As on Melbourne Draw, the bottom two lines are used as an information window, showing the mode and x/y co-ordinates of the cursor. Here, however, the bottom two lines are not accessible. Should you return to the main menu and then back again to Precision Plotter, key '9' restores the current graphics screen to the display. This is stored in permanent memory, while the program is held in RAM, A COPY of the screen can be printed out on a ZX Printer and the display SAVEd to tape for LOADing later. Final option served up by the main menu is Screen Planner. This gives you the screen display created with Precision Plotter, together with the ability to call from any of the banks of UDGs. These are displayed on the screen with x and y co-ordinates (now for row and column) and INK and PAPER are available at any time; you can experiment with different attributes, although there doesn't appear to be any option to alter BRIGHT and FLASH at this point. Return to Precision Plotter (via the main menu) and you've now got your composite display to work on. The instruction booklet gives details of how to call on these SAVEd screens from various memory locations within your own programs. Remember, though, that each screen SAVEd under these conditions uses 6912 bytes. Print 'n' Plotter has a program - Screen Machine - that can save bytes on graphics screens; we'll be looking at that in a future issue. DRAWMASTER Campbell Systems £6.95 Campbell Systems is probably better known for its database and filing programs, but Drawmaster certainly offers a host of features. The program autoRUNs on LOADing to display a blank work screen with a two-line information window at the bottom (showing the current mode of the 'pen': Trans(parent), Draw, Erase or Over and the current attributes: BRIGHT, PAPER and INK (FLASH is not included - as is fairly obvious from the display). The x and y pixel co-ordinates are indicated in normal Spectrum fashion - that's 0,0 in the bottom left corner - and there's no way of using the bottom two lines of the display (which, of course, is the information window). Also shown are the current Line and Column (standard character cells) and pressing the 'Q' key gives what's called 'Menu' - in fact, a guide to which keys do what (a useful system of quick reference, and you can't lose it!). The direction of the 'pen' movement is controlled by keys '1' to '8', normal cursor directions and keys I to '4' are the diagonals. Caps Shift with one of these cursor keys moves the cursor eight pixels (in the Draw mode this would give you a dot every eight pixels) and allows rapid movement of the cursor. Key 'Z' gives fine control, with the cursor moving one pixel at a time (accompanied by a beep) and with the x and y co-ordinates being updated continuously. Other movement modes update the co-ordinates only when you stop. Drawmaster has several interesting features. You can define a particular point called 'X' (marks the spot - geddit?) on the screen and Draw lines or Arcs to it from any cursor position. You can draw from the cursor in any of the eight specified directions and they'll continue on until hitting another pixel - or, alternatively, the edge of the screen. The Window commands are also useful. They'll let you define a rectangular window, store this for future use, recall it, paint it with current PAPER colour, or re-define its position on the screen. Drawmaster can also Rescale any image and draw it elsewhere on the screen, either larger or smaller. In fact, the program's quick reference guide was obtained by copying normal Spectrum text and reducing it to 75 per cent of normal size. It's a time-consuming process, but one that greatly enhances the scope of the toolkit. To reduce or enlarge a portion of the screen - create a window around it, then use the Clear Window command to quickly erase the original once it's been copied. Text can be placed on the screen, but while in 'text' mode remember not to overwrite line 22 - the screen will scroll! Circles can be drawn at a specified radius about the cursor and, of course, there's the usual Fill command. The program allows screens to be SAVEd or LOADed to or from tape, but there are no user-defined graphics facilities available. COMPUTER AIDED DESIGNER Dream Software £5.95 Despite the 35-page booklet that accompanies CAD, there seems a notable lack of index or reference material to guide you swiftly through the functions and commands. To start with, it takes some searching just to discover (a) what it will do, and (b) how you do it. As usual, the program autoRUNs on LOADing at the same time showing the 'command' screen. The information window at the bottom displays the last command you gave, the current cursor position and the heading - the latter is selectable from a range of one to 16, and it defines the direction in which a line will be drawn .. .N, NNE, NE, ENE, E, and so on. For some unspecified reason, East is Heading 1, North is 13, South is 5 - not the most obvious of choices. To change direction, key 'H' and the word 'HEADING' will appear in the information window. Now press Enter to confirm that a change is in order, then key in the new number, followed by Enter; all rather long-winded and time-consuming. Most commands require a similar procedure. Jotter will plot (set) a pixel and here the cursor keys are used to guide your 'plot' (Shift plus keys '5' to '8'). However, to step over a pixel you have to key 'E' to end Jotter, press the 'K' key to enable cursor movement, move the cursor, and then key 'E' to end this command... ouch! The cursor provided is a very small square, consisting of one clear pixel at its centre. One might reasonably expect the clear pixel to represent the vital position from whence all can be drawn. Wrong! It's at the top left-hand corner!! CAD supports a number of useful design shapes: Cube, Circle, Facet (parallelogram), Rectangle, Square, Triangle and 3D Box. There's also an option to define the position of 26 ('A' to 'Z') points on the display of all or specific points, drawing lines between two or more points, shifting the cursor to a specified point and nominating 'automatic points' (where, for example, the corners of a subsequently drawn cube are automatically specified). If you reset (clear) all previous points - remember to 'display' points twice (first displays, then un-displays!) or you'll be left with unwanted letters all over the place. In addition to the design shapes provided above, there are routines that (a) allow the design of a shape from the display to be stored for future use and (b) UDBs (user-defined blocks), blocks of four character cells that can be created and used within your display. Both options can be SAVEd to tape - but only used thereafter with CAD. The second option, UDBs, provides a 24 by 24 grid on which to create your design. Cursor keys move the spot cursor and the Space key either 'sets' or 'resets' a cell... and continues to 'set'/'reset' cells to the right; this happens quickly and it's not particularly easy to act on one specified cell. Quick fingers and care are called for. But, a word of warning... a return to the main display screen ensures that all previous work is lost; remember to SAVE it first. Text can be placed on the screen and a Fill option fills a shape with the current INK colour. Erase removes the last command you made and Grid will display a 16-pixel grid pattern around the edge of the display area. Overall, CAD is an interesting program that's obviously been developed with specialist design work in mind; it's not a general purpose graphics toolkit.
A considerable time later and, although it may not seem drastically different , the dots which shouldn't have been there have been removed. There's no actual 'delete' command in Paintbox, so the only way to take unwanted bits off is via a rather obscure use of the OVER and PLOT commands.
Paintbox is not solely a screen designer, its also a character designer. Here you can see the four character sets included in the package; these can be used within your screen design, as well as SAVEd separately as UDGs for use in other programs.
Paintbox's 'radical' mode - allowing line to be drawn from a central point to the cursor - prompted me to choose the Japanese army ensign to draw. The basic construction of the drawing was really quite easy but, as soon as I started to add colour, spurious dots appeared all over the place and I ended up with this mess!
Personal Computer News #75Aug 1984 · p.18
John Lettice
ART FOUR ART'S SAKE John Lettice discovers how software houses are catering for Spectrum users with artistic inclinations. Dynamic Graphics £14.95 Procom Software, [redacted] Paintbox £7.50 Print 'n' Plotter Products, [redacted] Melbourne Draw £8.95 Melbourne House, [redacted] Screen Machine £8.95 ISP, [redacted] There was a time when I'd look at the title screen of the latest Spectrum game and naively wonder how it was done. Certainly, if you sat down and concentrated hard you could see how it could be done, even taking the Spectrum's graphics limitations into account. But what baffled me was why someone, even for lots of money, would go to the brain-bending bother of working it all out. But now the secret's out. In as much as the shelves of computer stores ever bulge, they're currently bulging with Spectrum graphics packages. So much so that you need never again curse your re-INKed characters, or tell yourself 'I must do something about improving that fill routine'. Graphics packages usually cover two main areas: they'll produce full screen graphics without a lot of the hassle this would otherwise involve, and they'll also generally provide some form of user defined graphics (UDG) facility. The latter is certainly useful as an adjunct to the software's artistic side, although if it's a full sprite system you want you'll almost certainly have to look elsewhere. You shouldn't put too much emphasis on having a UDG facility within the program unless it has fairly advanced features. The Spectrum, after all, comes with a UDG design program on the Horizons tape, and it's always struck me as peculiar that people will sit down and write their own (often worse) program rather than use this. In the case of Melbourne Draw the extra is the fact that it allows you to save any one of the character positions on the screen you've designed as a UDG. While a routine of this sort is fairly easy to write, simply involving reading the character position and POKEing its details into the correct character, it's useful to have it integrated with a program that will draw that screen. And it's not that easy to knock off something of the calibre of Melbourne Draw. MELBOURNE DRAW From the packaging of Melbourne Draw it looks like The Hobbit has gone to Melbourne House's head. 'In fact with Melbourne Draw the graphics potential of your Spectrum becomes unlimited,' it trumpets modestly. It's probably advisable not to take this claim too literally, because although the package is good, if you reckon it'll do something like batik or silk vinyl finish you'll be sorely disappointed. Once it's loaded the program presents you with the standard Spectrum screen of 32 x 22 character positions. The bottom two lines give you information about the current status of the program, giving you the mode you're in, whether you're editing the screen or the attributes, and the current coordinates of the cursor you use to draw on the screen. The numbering for the latter corresponds with the Spectrum's own PLOT and DRAW coordinate system, with the addition of minus Y coordinates to allow you to draw in the bottom two lines of the screen. These aren't normally available from Basic, but it's possible to POKE attributes into that area of screen memory, and to use them as part of the main screen. Melbourne's way of dealing with the ensuing coordinate problem is certainly a fudge, but bearing in mind that you'll be a lot happier using the coordinates you know, it's an acceptable fudge. You will of course have to shift the report lines in order to use the area for graphics, but this is fairly plain sailing. Drawing itself simply involves using an ersatz eight-direction cursor cluster centred around the 8 key on the Spectrum. This moves a small flashing dot around the screen. The keys have a fairly gentle auto-repeat timing of around one second, so you won't find yourself lapping around too fast unless you want to. The cursor moves without leaving a mark while it's in skip mode, while set mode switches pixels on, and reset switches them off. Invert reverses any image the cursor moves over. Now close your eyes for a moment (finish reading this paragraph first) and imagine a graphics system that allows you to manipulate individual pixels on the Spectrum's screen. If you stare hard at the screen, apart from getting a splitting headache, you'll realise the difficulty involved in actually seeing what you're doing. Never fear, you can magnify the screen by four or by 16, and while you're doing this the magnification indicator in the report window shows you which area of the screen you're on at any given time. You can therefore work on your drawing in detail quite easily, although I'd suggest you rough it up on the full screen first, before tackling the detail. The next obvious problem you'll face with the Spectrum is that of setting colour. You can PLOT and DRAW on individual pixels, but you can only set one INK and one PAPER colour for each individual 8 x 8 character position. Eye-closing time again - think of a beautifully detailed drawing, the sort of thing that Albrecht Durer would be proud to show his mother. Now think of our hapless engraver rashly deciding to use a PAINT command he's just run up on his Spectrum. 'Aaargh!' he cries. He throws away his Spectrum and decides to open a wurst stall. Melbourne deals with this by including a FILL routine, then using a single character position sized cursor that allows you to set INK and PAPER one position at a time. Once you do this you'll probably still have to make amendments, but it should be; obvious what they are. And there's an even easier way to deal with the problem. You can overlay a grid onto the screen, and with this in place you can't really go wrong. The grid also comes into its own when you're dealing with UDGs. There are only the standard 21 available, but the program has the advantage of tying UDGs into PLOT and DRAW. When you're just using the Spectrum's standard graphics facilities it's actually difficult to relate the two. User defined graphics are easy to move around the screen, but it's not that easy to link more than two or three of them together without a lot of planning first. Similarly, although it's fairly easy to use PLOT and DRAW for larger illustrations, it's more difficult to move them around the screen, and if you're using UD Gs as building blocks for pictures you don't really have enough to be able to muck one or two of them up. Because of this it really is very handy to be able to virtually page UDGs in and out of memory, copying them to different locations and so on. I have a dream that you could write a program that stored whole screens in the form of individual UDGs, then used some sort of scrabble technique to rearrange the screens into other screens. Umm... I'll write it tomorrow... There's also a facility for saving the UDGs as an area of memory, and thus cutting down the amount of space your programs take up, but as this is in the Spectrum manual it's only reasonable that Melbourne should allow you to do this. Overall, it's an excellent package, and I've very few, and very minor, complaints about it. It allows you to scale the picture down by 7/8ths, or up by 1/7th, but doesn't allow you to reverse this feature. It would have been even better if you could, but equally it's nice to have the feature in the first place. THE SCREEN MACHINE Screen Machine is allegedly 'the ultimate screen editor'. You can be forgiven for thinking you're in the wrong article at this point, because while we are talking about editing screens here, a graphics design package isn't exactly what the rest of the world generally means by the term. And it's not by Ultimate either. It's less detailed than Melbourne Draw, and will therefore be easier to use. ISP has decided against using cursor-controlled line drawing at all, using instead 19 pre-packaged functions, along with 95 graphics characters (these are in addition to any UDGs you want to use) as building blocks. But having learned this, have a look at page four of the manual: 'Please note: The graphics character set provided with Screen Machine is copyright ISP Marketing Ltd.' If this means ISP wants a piece of the action from any commercial program that uses these characters I reckon the company's pushing its luck - like millions of others, I've programmed some of these graphics myself in the past, and I don't really see how ISP can copyright hearts, diamonds, clubs and spades symbols. Besides this, the graphics set is really pretty feeble (like I say, I've programmed some of them myself). Still, I'm looking forward to ISP suing Commodore or one of the other block graphics merchants for breach of copyright. At least there's none of that messing around with cursor-controlled line drawing, is there? Not exactly-say you want to draw a line, you'll find it's automatically drawn from the last pixel plotted or the end of the last line or circle drawn. The syntax D+5, -5 is used to draw a straight line, and this particular example is analogous to the Spectrum command DRAW 5, -5. This latter, incidentally, takes one less key depression. Good, eh? PLOTis similarly verbose, using a(x,y) as the equivalent of PLOT x,y. Fortunately, a few improvements have been made to the Basic commands. PLOT and DRAW commands that would take the Spectrum off its screen will simply be ignored, and circles can be drawn off the screen. But for these marginal improvements the program wouldn't really be worth it. There is, however, a method of creating a margin display, and you can rotate characters (only one character position at a time) in groups of 90 degrees. You can also enlarge. 'A common desire amongst users is to display characters at eight times their normal size.' It's therefore fortunate that 'the Screen Machine Enlargement command will enlarge the contents of any character cell by eight times'. Personally I always thought users were keen on enlarging characters by nine times, but clearly I stand corrected. Again, though, it's just done on a single character basis. Really, the whole package seems to me to be far too limited to make it worth using. The initial idea of making it easier than other graphics packages may have been a good one, but the commands used are by no means obvious. PAINTBOX The initial claim to fame as far as Paintbox is concerned is the fact that it gives you 84 UDGs using banks of data which are switched in and out of the UDG area as and when you need them. This gives you a much more powerful 'building block' facility than either Melbourne Draw or Screen Machine, and these banks can also, be used from within Basic programs. The drawing facilities are less comprehensive than those in Melbourne Draw, but it's really a case of swings and roundabouts. If you're using more UDGs then you might find it easier than Operating on a pixel by pixel basis. Paintbox also errs more on the side of pre-packaged routines like circles and arcs. In order to combine these facilities you use something called Screen Planner, which allows you to use the UDGs. By switching between this and the drawing mode you can build up quite complex pictures. There is also a facility for saving up to five screens to tape, then loading them back into memory. By paging these in and out you could produce a form of animation. DYNAMIC GRAPHICS The salient difference between Dynamic Graphics and the other packages dealt with here is that it allows you to produce sprites for combining with your own programs. The difference here is that you aren't just producing user defined graphics, but rather you're building animated sequences of characters that will shuffle across the screen in whatever way you want. The end result is a machine code subroutine that you can save in memory and call up from Basic programs, so space intruders without tears could well be with us at last. The second tape that comes in the Dynamic Graphics package is Drawmaster. This uses a cursor drawing method, again with eight possible directions. You can also draw arcs and circles, and fill and rescale your works of art. It will also define windows and revise the screen attributes. Drawmaster itself has its good points, but overall I feel that its main advantage is its sprite facility. There are a number of other graphics packages out, and they do seem to be developing in the same sort of way as Dynamic Graphics. The newly-released White Lightning is probably the most notable, being first and foremost a games design package. It is Forth-based, and although geared to games, screen design becomes an adjunct to this. Certainly it takes some getting used to, but the rewards are high, and it looks very much like the next major success story.
ZX Computing #13Jun 1984 · p.38
Clive Smith
QUICKSOFT Clive Smith reviews some of the more unusual programs on the market. PAINTBOX Print n Plotter Products I must admit I've never had so much fun with a utility program as with this one. Paintbox enables you to make up your own UDGs with ease, plot and draw by simple cursor movements, fill in your drawings and save screens for use in your programs. It is written by Joe Gillespie for the 48K Spectrum and is supplied with an easy to follow instruction booklet. It won't make you an artist overnight but after a couple of hours of loading the tape and reading the instructions I managed to draw this picture... As you can see I'm no Picasso! Paintbox does, however, have more serious applications than drawing funny pictures; as an aid in drawing graphs or in technical drawings and so on. Once you have loaded the tape, you are presented with a menu. From there you can view the available UDG bank; there are up to 84 user-defined characters in store. If you don't like the available choice, you can invent your own by calling up the drawing board. This enables you to plot your shape on a 8x8 grid by using a cursor. Once made, you then store it in one of the four banks. Another facility on the menu is "Sketch pad". Here you can practice building up a picture using UDGs before entering them onto your main picture. To build up your picture you first hit the 'Precision Plotter' key. Now the fun bit starts. You are presented with a blank screen apart from a cursor which can either be moved via the keyboard or a joystick. In the bottom right hand of the screen you are given an X and Y coordinate of the cursor. To draw a line you move the cursor to where you want the line to start and press the PLOT key. Moving the cursor to the place where you want the line to end and pressing the DRAW key will instantly produce your line. Paintbox has facilities to draw circles and arcs and in radial mode, will return the cursor to the start of your line; ideal if you are drawing a spoked wheel. Once you have outlined your picture, you can shade in any of the parts with different ink colours. Finally, you can put on your UDGs to complete the picture. If you make a mistake you can edit your last command. As you build up your picture it can be stored in memory and recalled at any time. Your picture can then be stored on tape and reproduced either as a screen$ or as memory bytes. It's possible to store up to five screens and this will leave you with about 6K of memory. To give you some idea what is possible with this program, have a look at one of the colour adverts in your magazine and take a close look at some of the drawings. With a little practice you will find that it's quite possible to draw pictures of that standard. The tape costs £7.50 and I think you'll find it's the best £7.50's worth you have ever spent. Print n Plotter products also sell some support hardware to go with it such as key overlays and a jotter pad. Print n Plotter Products are at Dept ZX, [redacted].
Crash #4May 1984 · p.96
REMBRANDT & CO Can't stand the penetrating smell of oil paints and terpentine? Are you drowning in diluted, diffused water colours? Forget about paint brushes, mixing pots and smeary dirty hands. The canvasses of the future are VDU or television screens and the crayons give way to flexible utility programs. Today the applications are limited by the lack of affordable colour screen printouts, but this is bound to change in the near future. Every artist will confirm that the selection of the right drawing utentils is of prime importance, and we therefore examine four drawing utilities now available to the budding Spectrum artist. C.A.D. from Dream Software Dynamic Graphics from Procom Melbourne Draw from Melbourne House Paintbox from Print'n'Plotter Graphical work on the screen may be subdivided into three main activities: Background and title screen creation Creation of user definable graphics (UDG) Handling of moving graphics (Sprites) The selection of the right utility depends entirely on the specific application. Not all utilities provide facilities for all three disciplines: each one excels in one of the tasks. SCREEN CREATION Screen creating can be a very time consuming job. The basics are simple: set or reset the 49'152 pixels which make up the screen and give the 768 attribute positions the required value. If you provide for every pixel a minimum of 10 seconds for setting or resetting, you will have to work non-stop for five days, 16 hours and 32 minutes. The colouring works out a fraction faster at two hours eight minutes. Obviously there are alleviating factors which reduce the required time enormously. Not all the screen has to be dealt with on a pixel resolution. Text and fill areas can be handled in character resolution. Nonetheless it is of prime importance that the utility provides an expedient and proficient way of performing screen functions without having to go through any lengthy function select procedures for a simple screen manipulation. Added facilities such as diagonal cursor controls, screen magnification, window creation, scrolling, etc, give the user extra flexibility and can prove a very useful bonus. Melbourne Draw scores the highest marks in user friendliness. This program provides the clearest logical procedure: screen and attribute handling are completely separated. The screen may at first be edited by positioning the cursor with the eight direction controls and then putting pen to paper for the actual drawing movement. The picture, including the usual edit area, can be created in 'black and white.' When satisfied the attribute edit mode is selected and the identical procedure can take place for the attribute character setting. Melbourne Draw is the only program which allows the attribute cursor to be moved in a non-destructive (pen up) mode. The colour may be selected by simply pressing the correct colour key (ink and cap shift paper). Melbourne Draw also provides a screen magnification facility, which can display a portion of the screen four or 16 times enlarged. This proves to be so useful that all the drawing is accomplished on the enlarged scale. The cursor position automatically dictates the screen area displayed and as a further bonus the entire screen may be pixel scrolled to centre the work area. There are no special draw functions such as circle, rectangle, etc, except fill. The text mode includes the useful option of writing text in any of four orientations (l/r, r/l, u/d, d/u). The program is aimed at providing a professional drawing board and proves to be a fast and efficient working tool for the serious user. Dynamic Graphics allows the creation of a window of any size, which may be positioned, edited and copied anywhere on the screen, thus providing for multiple screens or pattern generation within the screen. Further to this there is a rescale option, which will copy any rectangular area of the screen to any other part with different x and y scale. This can prove to be a very potent feature. Special draw commands such as line, circle and edit are also catered for. Although Dynamic Graphics is first and foremost a moving graphics utility. Its inbuilt screen creator proves to be an exceptionally versatile drawing instrument. Paintbox offers a Kempston cursor control option with its Precision Plotter screen editor. The inclusion of special draw functions such as fill, erase (last command), circle, radial mode and arc together with the option of including any of the 84 UDGs designed with the UDG editor provide for a useful screen tool. The omission of a paper colour control within the screen editor forces the user to go through the lengthy procedure of returning to the main menu for the sake of changing paper colour. The list of options in the C.A.D. program suggest a very powerful drawing tool. However the basic command procedure of C.A.D, proves to be a stumbling block. Every function is called by pressing the appropriate command key, upon which the selected command is displayed in the information window. The user must then press enter for execution. This is even required for positioning the cursor. This all makes for a lengthy procedure, which ultimately takes the fun out of drawing. Apart from the usual cursor control there is the option of using memorised headings, but in practice it is very difficult to make good use of it. The shape creation function, which allows the user to stoe and recall a sequence of drawing commands, proves to be very useful for pattern generation or similar applications. C.A.D. has a complete set of special draw commands, which include among other things triangle, 3D cube and 3D rectangle generation. UDG CREATION Paintbox offers a complete service for UDG addicts. The program caters for four banks of 21 UDGs which can be called into the UDG area for access. The edit facility is complete and practical to use including inverse, rotating and mirror functions. The UDGs are stored together with a M/C routine for calling the individual banks from Basic into the UDG area. A sketchpad is provided for experimenting with related UDGs (multi-character sprites). C.A.D. offers a less elaborate UDG facility. Up to 26 UDGs may be edited and stored. Melbourne Draw has no special editing facility for UDGs but editing is accomplished anywhere on screen using the x16 magnification mode. Any of the 760 character positions on the screen may be assigned as any one of the 22 UDGs. Pixel scrolling may position the required shape within the character grid. MOVING GRAPHICS Dynamic Graphics is the only program to actually handle sprites and sprite movement from within a user's Basic program. C.A.D. caters for the creation of up to 40 24x24 pixel sprites (3x3 character), but leaves it to the user to inject any life into the screen. It does not provide any M/C routine for fast pixel to pixel movement. Dynamic Graphics provides the user with a complete sprite animation facility and must be invaluable for the programmer who doesn't want to delve into the machine code labyrinth but requires smooth animation. Six sprites of up to 4x4 characters may be generated and edited with the excellent sprite creator. The six graphic characters are treated as individual frames of an animated film and the user may test the resulting motion by selecting the animated display, which sequences the frames on display to create a living object. The character set may then be saved to tape to be called up for later use. To integrate the moving sprites without any knowledge of M/C, a sprite user subroutine compiler is provided, which creates a sprite positioning subroutine anywhere in normal user memory. This subroutine can be accessed via Randomize User commands from within Basic. Up to 10 different frames may be positioned consecutively on the screen and the result (if handled correctly) is a very smoothly moving object. CONCLUSION The four programs under scrutiny all have their individual merits. Melbourne Draw stands out clearly as a professional tool for title and background screen creations. Paint box provides the most flexible UDG creator combined with a useful screen editor. Dynamic Graphics is a must for anybody wishing to create moving graphics within their own programs without bothering about M/C handling. C.A.D. provides a multitude of different facilities for screen, UDG and sprite editing. THE PROS AND CONS C.A.D. Plus: - Multitude of special draw functions: Line, rectangle, square, triangle, circle, parallelogram, 3D cube, 3D rectangular box, fill, erase (last command). - Grid display on edge of screen. - Assignment of (A-Z) letter labels to 26 points anywhere on screen for 'Draw by letters' facility. - Shape creation: 26 preprogrammable user commands will perform a series of draw commands (= draw routines). - Sprite generation: up to 40 3x3 character sprites. - Sprite generation of up to 40 3x3 character sprites Minus: - Complicated and slow drawing procedure (select command and press enter). - Confusing and unpractical heading facility (cursor or preset heading). DYNAMIC GRAPHICS Plus: - Two cursor speeds. - Special draw functions: Line, circle, arc, fill. - Window creation with full edit and positioning facilities. - Rescale of rectangular area anywhere on screen. - Excellent sprite creation 4x4 character sprite edit facility including animation experimenting. - Sprite user subroutine compiler: Creates relocatable M/C routine for handling up to 10 frame 4x4 moving characters from within Basic. Minus: - No grid overlay for screen creation. - Complicated cursor direction controls. MELBOURNE DRAW Plus: - Separate screen and attribute editing. - Attribute skip (pen up) mode. - Diagonal cursor movement. - Magnification x4 and x16 of screen sections. - Fast screen handling. - Grid overlay using Bright facility. - Pixel scrolling of entire screen with wrap around. - Text can be written in four orientations. - Reducing and enlarging of entire screen. - Simple UDG creation of any character on screen. - Full screen available for drawing (information window relocatable). Minus: - Complicated fast cursor movement. - No special draw commands except fill. PAINTBOX Plus: - Two cursor speeds. - Kempston cursor control option. - Special draw facilities: Fill, erase, circle, radial mode arc. - Excellent UDO creation: four banks of 21 UDGs full UDG edit and handling facility from within Basic. - Combined screen and UDG facility (Screen Planner). - Sketchpad for related UDG display during UDG edit. Minus: - Long-winded paper colour select.
Above: Sprite animation avoids delving into machine code in Dynamic Graphics.
Below Left: A boat made from Paintbox's bits and pieces.
Below Left: Zooming in on Smaug and showing Melbourne Draw's mirror image facility.
Below: UDG addicts are catered for in Paintbox.
Left Top: Smaug from The Hobbit with a purple eye.
Left: C.A.D.'s special draw commands include 3D cubes and rectangles.
Lower Right: The title screen of The Hobbit as it should really be.
Right Top: A zoomed in close-up from Terror-Dactyl 4D.
Right: A Ferrari from Paintbox.
Top: A good example of Melbourne Draw's excellent magnification facility.
Personal Computer News #58Apr 1984 · p.46
Steve McClure
THREE OF A KIND Steve McClure scrutinises three of the best Spectrum graphics packages. NAME: Dynamic Graphics PRICE: £14.95 PUBLISHER: Procom Software, [redacted] OTHER VERSIONS: None OUTLETS: Mail order/retail NAME: Painbox PRICE: £7.50 PUBLISHER: Print 'n' Plotter Products, [redacted] OTHER VERSIONS: None OUTLETS: Mail order/retail NAME: Melbourne Draw PRICE: £8.95 PUBLISHER: Melbourne House Software, [redacted] OTHER VERSIONS: None OUTLETS: Mail order/retail Each of the graphics programs reviewed here - Dynamic Graphics, Paintbox and Melbourne Draw - has its own merits. But it's none too easy to find out what a program is like to use from a quick glance at a manual. This article should give you an idea of the relative pros and cons of three good programs. DYNAMIC GRAPHICS Procom Software's package is ambitiously designed and it will take you many weeks to explore all its possibilities. You get, two tapes, one of which has two sides of programming material. The manual claims 'you do not have to read through the instructions before commencing'. Well yes... and no. It's certainly true of the second part of tape 2's program, Drawmaster. This allows you to create full-screen graphics and the menu is self-explanatory. However, when it comes to Tape 1, where you can design animated sprites and user defined graphics (UDGs) you definitely do need the instructions. I found myself staring for rather a long time at six small frames, each containing a picture of a small bird in various stages of flight, with no real idea of what to do next. Having loaded the first part of Dynamic Graphics you see the six frames described above. These are offered as examples of what you can do with the animation capacity of the package. The manual describes how to combine the panels into a brief animated sequence, and very impressive it is too. Needless to say, once you've mastered the 'art' of design and animation, you get immense pleasure from seeing your own creations hop, skip, jump and wriggle across the screen. The first section of the program offers you 11 menu commands to help you create your own characters using 'G' for 'Get character', or 'A' for 'Amend' to' draw a character 'freehand'. This turns out to be a rather imprecise way of creating graphics as you have to repeat the function over a series of boxes which will eventually come together to make up a full image. Other handy functions in the first menu are 'clear' and 'reverse', which do just what their names suggest. - Menu two lets you play around with the images you've created. In addition to useful functions like 'rotate' and 'flip' vertically or horizontally, you can also move a character about without losing any of the image off the edge of the screen. Command menu 3 deals solely with storing your UDGs for use in your programs. The fourth menu has some pretty spectacular tricks in store: you can swap sprites from box to box, as well as flipping them and rotating them in the same ways as you can their constituent characters. Side two of the first tape lets you take any of the six 'sprites' you've constructed and place them anywhere on the screen. Using side one of the tape you will have created a subroutine which can be placed anywhere .in user memory and is relocatable. Should you lose track of your masterpieces, there are several blank 'Sprite Planner' pages provided in the manual so you can sketch sprites you've designed. Tape two of Dynamic Graphics consists of a fairly conventional full-screen drawing program, called 'Drawmaster'. This is a basic drawing program which simply allows you to move the cursor about the screen, drawing pictures. It has the disadvantage that in 'transparent mode' the program changes the colour of those areas it moves over, even if you're not drawing anything. One notable feature of Drawmaster is that you can 'hop' about the screen with the cursor. The function lets you draw at specific intervals and thus gives you a great deal of flexibility if you need to mark-up the screen. Other features include changing the speed of the cursor, drawing arcs and lines between the cursor and any other point, saving images to tape and so on. All in all, this part of the program compares well with similar limited graphics packages. Undoubtedly, Dynamic Graphic's best feature is the ability to create and animate sprites. The rest of the package is very good, and well-thought out, but it is in making the unique UDGs that the program excels. PAINTBOX Print 'n' Plotter Products' Paintbox also deals with UDGs but no animation is involved. The emphasis in Paintbox is on creating high-resolution characters, starting with a series of pro-defined characters. The novice graphics programmer can choose from a wide variety of subjects, ranging from battleships and aeroplanes to tulips and trees. Of course, you can design your own graphics which are then stored in one of four UDG banks. This adds up to an impressive 84 UDG capacity (168 if their inverse equivalents are included) - not something to be sneezed at. Paintbox comes with a demo program which is a good way of getting a quick look at the program's capabilities. The UDG banks can be viewed simultaneously, and this is very useful for keeping track of how you're progressing with the development of a set of characters. IN USE Creating a character to be stored in a bank is very similar to the process used in Dynamic Graphics. With Paintbox, however, the idea is to create and store a large group of UDGs for later use in your programs. Using the Sketchpad and Drawing Board sections of the program, you set up UDGs in a very neat and precise manner. Sketchpad lets you play around with characters from the UDG banks, arranging them as desired. In Drawing Board, you can modify a character from the Sinclair set, or start with a blank and design your own. Functions like 'inverse', 'rotate' and 'mirror' allow you to alter the character as you like. Unlike Dynamic Graphics, there is no facility for shifting the character left, right, up or down the screen edge. The next section of Paintbox is called Precision Plotter. One unique feature here is 'erase', which lets you wipe out the last operation performed, not all previous operations. There are the standard functions of circle, line and are which produce very good curves on the screen; no mean feat when it comes to drawing with the Spectrum. There's also a fill command which paints blocks of colour on-screen without your having to handpaint every single pixel. By far the most interesting section of Paintbox is the part called Planner, where all the work you do in other sections comes together. In essence, this lets you combine the UDGs you've created with designs you've drawn using the full-screen precision plotter. There are possibilities here for creating graphics of great beauty and imagination. Each bank of previously designed UDGs is displayed at the foot of the screen, while the rest of the screen area is taken up with graphics from the precision plotter. Two ways of saving your works are listed in the manual which is clear and well laid-out. One way to save what you've done is simply to dump the file to tape using SCREEN$. This is rather slow. A faster way, and one which can be used from within Basic programs, involves dumping the screen into memory as bytes, then calling it to screen via machine code routines. There is also a clear explanation in the manual of how to use the Spectrum to hold as many as five full files. MELBOURNE DRAW This is perhaps the most visually appealing of the three programs. It differs from the previous two in that it emphasises almost exclusively a function which forms only one section of Dynamic Graphics and Paintbox, namely the full-screen rectangle across which you move the cursor to create lines and blocks of colour. It does this far better than either of the other two programs. Melbourne House has taken a calculated risk in making the package's appeal rest entirely on its capacity to draw full-screen graphics. Of course you can design individual UDGs if you want, but Melbourne Draw is far more useful for drawing graphs and the like. It also lends itself more to purely 'leisure' uses than the other two programs. Since all Melbourne Draw's functions are based on the full screen. It makes sense that the window at the foot of the screen is full of well laid-out information. This is a definite plus as the windows of both Paintbox and Dynamic Graphics are somewhat skimpy on information. Different alternatives are also clearly presented as to the colour of ink or paper, degree of brightness and so on. IN USE In terms of making your mark on the screen, Melbourne Draw is no different to the other two packages. Where it really comes into its own is the facility which lets you magnify the screen as much as 16 times. Anyone using the program is likely to find this the most appealing and widely used function. It may not sound like much, but when you're trying to create a finely-detailed picture it's an invaluable aid. A handy guide as to where you are on the full screen while in this magnification mode is provided by a miniature version of the screen located in the information window which shows your exact position. As you move to the edge of the magnified screen you find the cursor has automatically moved into the next quadrant, the movement being echoed by a corresponding movement in the small version of the screen in the window. Another unique feature of the program is the 'grid' function which is useful for position your graphic designs. It's totally independent of the design you have onscreen at the time and can, like any other image, be magnified up to 16 times. Yet another bonus is that you can expand or contract the screen as a whole, down by 7/8ths of up by l/7th. This allows a flexibility not found in most graphics programs. Melbourne Draw is useful mainly or drawing ontricate backgrounds for title pages of games, although it lets you store UDGs in an efficient way that economises on memory. The manual claims that Melbourne Draw is useful for more specialised applications such as drawing circuit diagrams, and this claim is born out by the high degree of precision that can be achieved. VERDICT The three programs reviewed present very different facilities. Of the three, Dynamic Graphics will probably find most appeal, but the other two bear careful consideration. It all depends on what you want to be able to do with the graphics capabilities of your Spectrum.
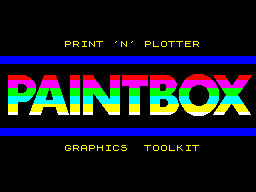
A sample screen from Paintbox. Well worth the time and effort.
Abstract doodles in minutes from Paintbox.
Animation sequences from Dynamic Graphics.
Dynamic Graphics - a series of designs for sprite animations.
Many choices from Dynamic Graphics.
Paintbox again...
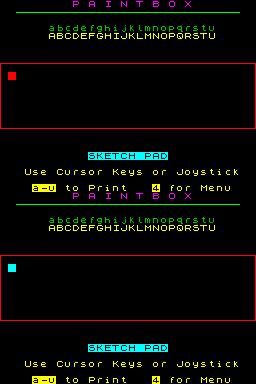
The character editing section of Paintbox.
Title screen from the Hobbit, Melbourne Draw.
Sinclair User #25Apr 1984 · p.548/108/10
Gilbert Factor 8/10
John Gilbert 8/10
PACKAGES TO HELP YOU HELP YOURSELF John Gilbert reviews the programming aids now available for the Spectrum Most people buy computers with some purpose in mind. A few of them may want to learn about computing and to write programs. It is when that happens that utility routines may be needed to make the task easier. There is a great variety of utilities available for the Spectrum which compensate for some of the inadequacies. One of the most common types of utility is the toolkit or language extension. The Spectrum Super Toolkit, from Nectarine, provides all the necessary function a Basic programmer would need. It is also very user-friendly and should help anyone who has the slightest interest in developing programs, no matter whether they be beginner or an expert. The toolkit will run on the 16K and 48K machine and occupies approximately 2.5K. That means at least 6K on the 16K Spectrum will be available for user programs. That is an achievement for the author, who has included 12 routines in the package. The exceptional characteristic of the Super Toolkit is the one-key entry system which invokes each of the 12 commands. All you have to do to use a command is hold down the ENTER key and press the command key, such as 'L' for list all variables. The package is one of the most comprehensive on the market. As well as generating a full re-number of Basic programs, deleting blocks of lines, listing variables and showing the memory used by a program, it will also produce a map of the memory in the computer, including Microdrive and channel information, and read the tape header of any piece of code. There are no complicated POKEs involved in making any of the utilities work. All you need is a RAND USR instruction to enable and to disable it. You will also have to use the keywords PRINT or REM to re-enable its facilities after running one of your programs. You should have no difficulty using any of the routines, as the toolkit will produce prompts on the screen for information it needs to perform its work. For instance, when you ask for line renumbering the screen will clear and the computer will ask at which number you want your program lines to start. It will then ask for the step size between each line number. The automatic default, if you press ENTER for each of those prompts, is a line-numbering system starting at 10 and rising in stages. The manual with the package is just as good as Super Toolkit. It explains each utility command in turn and on the back page provides an uncluttered index of how to access them. It also shows how to turn off the toolkit when you want to use interrupt-driven machine code routines in your programs. Super Toolkit cannot be recommended strongly enough. It costs £9.95 and fills a big gap in the market. Spectrum Extended Basic, from CP Software, uses a one-keyword entry system similar to that of the Nectarine toolkit. Once invoked, all the user has to do as type an asterisk and then press the key to activate a desired command. For instance, the 'A' would be pressed if the user wanted to use AUTO line numbering. The Basic uses approximately 5K of memory in which to operate. Although that is not bad for a package which allows the use of 10 new commands, when compared to the Nectarine product it takes much more memory. The use of memory by a utility is all-important. A good utility will reside in memory almost invisible to the programmer, who should be able to do anything with the machine except initialise it, and it should utilise as little memory as possible, so that users can write long programs. A utility which uses a great deal of memory defeats its own purpose. The Extended Basic could be described more accurately as another toolkit and not a set of machine code patch routines on the existing Sinclair Basic. It will operate with the Sinclair language but the routines included in the package are more in line with a toolkit than an extension of a high-level language. It includes an auto-line number routine, a real-time clock, continuous scroll function, block code delete and an indication of the current state of the computer memory. It is almost as easy to use and as helpful as the Nectarine toolkit and many of its commands can be incorporated into user programs. Extended Basic is not a competitor to the toolkit but it is, however, a useful companion package. Spectrum Extended Basic costs £9.95 and is expensive for what it offers. The other type of utility which is helpful on the Spectrum is the graphics package Although Sinclair Research included exciting graphics capabilities with the Spectrum, it is often difficult for the programmer working in Basic or the amateur programmer to get the most from the graphics potential. One of the best ways to highlight a program or give it a title is to increase the size of the lettering and characters on the screen. It could be done with a number of PRINT statements but it is possible, using machine code or POKE routines, to magnify the original character set from the ROM. A new utility package, Print Utilities, from Sinclair Research will allow you to magnify the character set and also to increase or decrease the width of lettering on the screen or on a printer. The software will allow you to use four widths and two heights. There are two versions of the package, one for the 48K and one for the 16K, although each performs identical tasks. Once it has been initialised you can set up the character height and width using a print command which employs a hash. After that you must put a CHR$ command and a number. For instance: PRINT 15; CHR$ 28 would select a double-height character set. Other CHR$ settings would give 32, 42, 16, and 21 characters a line and will also move the cursor left and right and clear the screen. The different-sized character sets can be used in programs but they can also be used to reproduce listings to make them easier to read. Unfortunately the manual infers that the package is set up for the ZX printer, although with Interface One, which is catered for, output to a dot matrix printer or daisywheel would be possible, using the correct software. Output to a printer is more difficult than to a screen, as the double-height mode is cancelled after one line is printed and it is not possible to mix different heights in one line of text. Print Utilities can be obtained for the 48K Spectrum and costs £9.95. For the usefulness of the product that is expensive. Paintbox is a more powerful graphics utility for the 48K Spectrum. It includes the capacity to manipulate 84 user-definable graphics which are set up in four switchable memory banks. Any one of the four sets can be switched into the 'present' mode, taking the place of the letters A to U. It is possible to change any of the example characters set up in the package and to save them on tape if you want to use them in your Basic or machine code programs. Paintbox contains a special facility which enables the user to put several UDG graphics on the screen together to examine the effect. It is also possible to rotate, inverse, and mirror the graphics with the press of a key. Another facility is the precision plotter, which will allow you to draw pictures on the screen using lines, circles and arcs. The pictures can be shaded with a selected colour and the colour for INK and PAPER can be changed. The utility looks like the one on the Sinclair Horizons tape, although it is set out slightly better and is more usable so far as Basic programming is concerned. The screen planner uses a combination of UDG graphics which can be created using the UDG banks and the Precision Plotter. It allows you to see the finished result of all your work. The package is a powerful graphics aid and, if the demonstrations are any criterion both in the manual and on the tape you could produce some professional screen displays. It is possible for even a beginner to draw reasonable pictures using the package. Paintbox can be obtained from Print and Plotter and costs £7.50. There are still few utility packages available for the Spectrum and the computer has been on the market for nearly one-and-a-half-years. It seems that most software companies are concentrating on producing arcade games of one kind or another. That is unfortunate, as many Spectrum owners could produce original and interesting programs if they had access to more utilities. It might also encourage more people to start programming if the see what can be done with the utilities available, Some people may say that it is a little late to start thinking of producing more utilities for Spectrum owners but there are still many users trying to find interesting things to do with a computer. It would certainly be helpful if the few utilities on the market at present became many in the near future. Nectarine, [redacted]. CP Software, [redacted]. Sinclair Research, [redacted], Print and Plotter, [redacted].
'It is often difficult to get the most from the graphics potential.'
Crash #2Mar 1984 · p.72
Franco Frey
FRANCO FREY TAKES A LOOK AT AN ARTY UTILITY Producer: Print 'n' Plotter Memory Required: 48K Retail Price: £9.95 Language: Machine code Author: Joe Gillespie If you've ever tried to draw a high resolution picture with the bare and BASIC facilities of the Spectrum, you will probably want to investigate the appropriate tools and utilities which exist for this purpose. You have the choice of a hardware-based system using a light pen or a digital tracer with the required software routine/utility, or you can go for a less expensive software solution such as a graphics handling utility program. Paintbox fits into the second category and covers all aspects of the Spectrum graphics. You may select between the cursor keys, cursor-controlled joystick of the Kempston joystick to use as a 'drawing-pen'. The program is menu driven and splits into two major functions - the UDG creation and handling, and the high resolution screen plotter. UDG EDITOR The UDG Editor is excellent; it allows you to create four times as many UDG's as there are in the normal Spectrum BASIC by storing in four banks of 21 UDG sets into memory, which can then be called selectively into the normal UDG area of the Spectrum. The Editor allows you to view the UDG banks and to recall any of the four banks for editing. Selecting DRAWING BOARD will display the UDG bank, the UDG in magnified form, normally and inverted, and in actual size, and the decimal values for each line. You may call up a normal Spectrum character, an existing UDG character or a blank for editing purposes. Using the cursor keys/joystick and fire button, you can edit or completely redraw the UDG, and when finished, allocate it inside the UDG bank. In doing this, the inverse and rotate (4 x 90°) and mirror image facilities are very helpful. Having created all the necessary UDG's you can save them on tape together with a machine code routine for manipulating them from BASIC, ready to be recalled in your own programs. PRECISION PLOTTER The Precision Plotter is the drawing tool for your high resolution pictures, and provides drawing facilities using the cursor keys/joystick with a constant display of the position co-ordinates. Two moving speeds may be selected by use of the SHIFT key. All the drawing of Spectrum BASIC may be used including: Plot, Draw, Circle, Ink, Over, Copy, Save & Load. Selection of Paper Colour has been omitted from within the screen plotter quite deliberately to avoid the confusions which can arise from the low resolution colour map of the Spectrum (i.e. use of only 2 colours - ink & paper within the 8 x 8 character grid). This user-protection may be overcome by breaking to the main menu and recalling the screen plotter, whereupon the new paper colour may be selected and the permanent memory screen recalled. Additionally, there are the following useful facilities; Fill enclosed areas, Erase last operation, Radial Mode - retains starting point of the drawing line in the original plot position, Arc, Cursor Choice - crosswire or dot, Permanent Memory - retains the current screen in memory, Graphics - recalls screen, Break - stores screen in memory and returns to main menu. IN USE The UDG Editor and Screen Plotter may be combined by selecting Screen Planner from the Main Menu: all 84 UDG's may be drawn on screen with the high resolution screen as background. The low resolution print coordinates are displayed in this mode, and Ink & Paper colour may be changed. By constantly switching between Screen Planner and Precision Plotter you can build up a picture within the limits of your own imagination and the Spectrum's limited screen display. The current UDG's may be expanded by loading previously stored UDG banks, thus increasing the amount of UDG's on screen. Throughout Precision Plotter and Screen Planner you may select to save your efforts to tape with a SCREEN$ display file save or with a normal memory file save, which includes the machine code routine for instant recall from BASIC (using RANDOMIZE USR 59980). The memory file, however, must be protected from the BASIC area by lowering RAMTOP to 53059 (with a CLEAR command). The data to screen dump routine may be amended so that multiple screen files may be stored and recalled. The program proves to be very foolproof in as much that if the permanent memory does get corrupted, there is still the Erase Memory as a backup facility, so you don't risk losing hours of work. Nevertheless, it would be wise to save intermediate results to tape for protection against brown or blackouts! A commendable effort by Print 'n' Plotter - now if only the package included a pinch of artistic talent, I might be able to draw... COMMENTS Control keys: Menu driven, self explanatory - cursors/joystick for positioning, SHIFT for slow movement. Plot = Q, Draw = W, Fill = F, Erase = E, Circle = H, Rad Mode= R, Line Mode=3, Arc = A, Ink = X, Over = N, Permanent Memory = P, Graphics = 9, Dot Cursor = M, Crosswire Cursor = K, Break = CAPSHIFTISPACE, Copy = COPY, Save = S, Load = J. Sound: none Features: 24 page booklet and excellent Demo Program
Your Spectrum #2Mar 1984 · p.58
Peter Shaw
Stephen Cathrall
Stewart McPherson
SPECTRUM SOFT Starting this issue Your Spectrum will be touring computer clubs up and down the country in an effort to find dedicated games enthusiasts who will give us their impressions, thoughts and feelings on the current selection of new releases. Little do they know it, but these unsuspecting souls will be contributing a large slice of our regular review section in the future. This month we visited the Stanwell Computer Club (which meets weekly at the Stanwell School, Short Lane, every Friday evening from 7-10pm). Five of the resident 'freaks' were enlisted to tell us (and you) what was good or bad about the programs we gave them to play around with. In some cases comment was justifiably harsh, and in others they could hardly contain their glee at coming across a really well thought-out game. The guinea-pig five whose comments appear below, are all members of the club, and they are (in alphabetical order): Corrie Brown, Stephen Cathrall, Ryan Davis, Stewart McPherson and Peter Shaw. Peter, by the way, is also Secretary of the Stanwell Club. Them we do thank. PAINT BOX Print 'N' Plotter Products £7.50 Paintbox is a graphics utility which enables the user to create user-defined graphics and SCREEN$, allowing hi-res sketching with your UDGs.
Personal Computer Games #3Feb 1984 · p.15
Stuart N Cooke
MAKING MONSTERS A wave of new Spectrum programs allows you to design your own games and graphics. Stuart Cooke investigates. The computer market is flooded with machines offering high resolution graphics, sound and joystick ports. It's therefore not surprising that a person who is learning a new computer language usually starts by trying to draw pictures on the screen or even attempting to program a game. This may be either one of their own design, or a copy of an arcade game. Usually this results in disappointment because the game is too slow and objects jump around the screen; nothing like the smooth graphics in the arcades or even in the programs that come from the well-known software houses. Software packages designed to aid graphic creation are now appearing on the market. These range from games designer programs to self-contained graphic languages which enable the owner of a home computer to produce games with something like arcade quality, including smooth graphics and good sound effects. The Sinclair Spectrum, being one of the best selling micros in Britain at the moment, has perhaps the widest range of graphic software. For the person who wants to design their own graphic games easily. Quicksilva have produced a menu-driven games designer program, unoriginally named Games Designer. Quicksilva's claim that you get 'a lifetime of games in one package' is probably a little exaggerated. Nevertheless, for a person who wants to design his own games this package is an ideal introduction. Games Designer is menu driven. This means that you need no programming knowledge at all to use it as you never have to write a single program statement. When loaded, Games Designer automatically runs and the main menu is displayed on the screen, giving you a list of eight options. These are: 1 PLAY GAME, 2 SELECT NEW GAME, 3 ALTER SPRITES, 4 CONFIGURATION, 5 MOVEMENT, 6 ATTACK WAVES, 7 LOAD FROM TAPE, and 8 SAVE TO TAPE. Option 1 allows you to play the 'current' game. The program automatically uses the cursor keys for movement, but it is possible to select other keys and even use a joystick. The second option allows you to select one of the games included within Games Designer. There are eight of these, for example - Attack of the Mutant Hamburgers and Halloween. Quicksilva claim that four of the games supplied with the program were designed by people with no programming expertise but, in fact, all were high quality. The characters used in Games Designer are called sprites. Each sprite consists of a 12 x 12 square in which each dot can be either the foreground or background colour. Option 3 lets you define your character on the 12 x 12 grid. There are 31 sprites in all and these are grouped as follows: 00-15 are the aliens; 16-23, player's ships or bases; 24, player's missile; 25, missile for the aliens; 26, spare (used for moving sprites around); 27, shield; and 28-31, explosion sequence. All of the keys used to design a character are displayed on the screen making it very easy to design a character of your choice. Pictures overleaf and on page 17 show the 31 sprites from the Halloween game and one of these sprites being designed. The configuration section allows you to choose the game format, screen colours, special effects and to define the sounds for the bombs and explosions. Game format allows you to choose from Invaders type, Asteroids type, Scramble type and Berserk type of game. The special effects select whether you have a blank screen or stars as the background (but no other choice is available). You can also select whether the aliens appear singly or in groups and whether a shield will protect your ship. Defining a sound is simplicity itself. When you select the sound you want, the sound editor chart appears on the screen. This consists of five slide controls. FREQ sets the pitch of the sound; RAMP 1 sets the speed at which the pitch increases; RAMP 2 sets the speed at which the pitch decreases; LEVEL sets the amount of pitch change caused by Ramps 1 and 2; and TIME sets the length of the sound. Any change that you make to the controls can be heard by pressing the symbol shift key. A wide range of sounds can be made by altering the slides and as much fun can be had defining the sounds as in playing the games themselves. You can define the movement of the aliens or monsters by using the fifth option. This is a little limited as you can only move the character in any of eight directions following one of eight programmable movement patterns which can be linked to each other. Basically the movement pattern consists of a series of numbers, each representing a certain direction as specified below. North: 0 North East: 1 East: 2 South East: 3 South: 4 South West: 5 West: 6 North West: 7 So for example 0, 0, 0, 2, 2, 2 would move three units up then three right. As can be seen it's a little crude but nevertheless. some complex movement patterns can be designed. When option 6 is selected the ATACK WAVES chart will appear on the screen. This screen allows you to choose which aliens appear on the screen, whether or not the aliens are animated, the score value and speed of the aliens and which movement pattern they follow. As previously mentioned this option is used to animate the sprites and it is possible to 'chain' together either two or four slightly different sprites, this enables you to make wings flap or eyes move, for example. The main problem with Games Designer is that even though you can redefine the graphics and the movement patterns, the games designed are all basically the same. If you choose the Invaders format what you get is essentially a game like Space Invaders with graphics that you have designed. Another disappointment is that you can't define your own background. The only thing you can do is select the colour and whether you wish to have stars or not. Despite these limitations Games Designer is simple and fun to use. It is possible to produce fast games with smooth graphics and good sound without having to know a thing about programming. For the programmer who doesn't want the limitations of a menu driven games designer, such as the Quicksilva program, and who is willing to put a little more effort into his programming, two new 'graphic languages' have appeared for the Spectrum. Fifth from Computer Rentals Ltd (CRL) and Scope from ISP Marketing Ltd. The first of these packages, Fifth, is not so much a new language but rather an extension of Basic, giving the Spectrum owner another 25 commands. These new commands are placed within REM statements so that the Spectrum will accept the words and not reply with a syntax error. Compared with some of its (dearer) rivals, one of the main disadvantages of the Spectrum is that it lacks sprites. A 'sprite' is a user-defined graphic, that once set moving on the screen, will continue independently while the Basic program performs some other function. It will only return to the Basic program if the sprite collides with another object or goes off the screen. With Fifth the Spectrum user now has access to sprites or rather to 'objects', the name given to sprites in this program. An object can be defined as any of the Spectrum characters, both alphanumeric and user-definable graphics. Once an object has been defined it's possible to set it moving in any of 16 directions using the VECTOR command to set the direction and then MOVE to start the object in motion. Once it's moving the program can 'go away and perform another function while the object 'glides' across the screen pixel by pixel on its own - an effect which is really amazing to watch! The SPEED command allows you to change the speed at which an object moves on the screen. As well as commands to move 'objects' around the screen there are other graphic commands. For example FILL changes the ink and paper colours of the whole screen without clearing it, a function that is not possible in Basic. REPLACE is similar in effect to FILL but is only changes a colour to another specified one. For example: 10 INK 0: PAPER 7 20 PRINT INK 0: PAPER 1 30 REM REPLACE This will change all occurrences of black ink on blue paper to black ink on white paper. Fifth also provides a new sound command, having no fewer than four parameters rather than the usual two. The effects that can be produced are simply amazing and are as good, if not better than the sound in commercial games programs. The second of the two, Scope, unlike Fifth is a self-contained graphics language. A 'SCOPE' (Simple Compilation Of Plain English) program is written within Basic in REM statements and is then COMPILED by the Scope program. The Scope manual states that, 'SCOPE is primarily intended for high speed handling of graphics, colour, sound and animation', and fast it certainly is. Scope offers 31 commands, nearly all of which have an equivalent Basic instruction, the difference being that Scope is much faster. However, most of the commands only handle integer numbers in the range 0 to 255 and it is possible to set up variables (A to Z and a to z) with the VAR command. Because there will be occasions when you need a larger number, for example to hold a score in a game, Scope also provides a BVAR (Big Variable) command which allows you to calculate and print numbers between 0 and 65535. A possible limitation of Scope is that variables can only be increased or decreased. There are no commands for multiplication, division or any scientific functions. Scope is a structured language, which means that a program can be written in small separate sections, then tested as you write the program in. Later routines can then call up those which you have previously tested. For the serious programmer who wants to write fast games programs, (or any program which includes graphics) both Scope and Fifth deserve to be looked at. Both packages have their good and bad points but Fifth appears to be more flexible allowing you to use Basic as well as Fifth commands and to pass variables between the two. As well as programs that enable you to write faster and smoother games programs, there are those that are invaluable to anyone wishing to produce a graphics display, be it for a games program or some other purpose. Two such programs are Melbourne Draw, produced by Melbourne House and Spectrographics, by Bridge Software. Both these programs are 'sketch pads' which enable you to draw more objects on the screen. They each have their good and bad points, but one failing of both programs is that it is difficult to draw curves. It is only possible to move the 'pen' in eight directions. Spectrographics has a built-in user definable graphic producer, making it easy to define your graphics characters, while Melbourne Draw allows you to save an area of the screen for graphic characters. Another good feature of Melbourne Draw is its ability to enlarge sections of the screen, thus making it much easier to see exactly what you're drawing. Both packages enable you to fill in an area of the screen with the current ink colour, if there are any holes in the object, the ink will leak out of the shape and spread all over the screen. Melbourne House's program has a facility that allows you to stop the fill command, and return the screen to its original condition before the fill was started. However, with Spectrographics you will have lost your picture. Melbourne Draw only has facilities to draw lines while Spectrographics allows you to draw boxes, triangles, and circles, automatically. Both programs save time when designing any playing areas or other graphics for use in a program, though it would have been nice to draw curves easily. Paintbox, a graphics program from Print 'n' Plotter Products offers similar facilities to Melbourne Draw and Spectrographics. Paintbox allows you to define 84 user-definable graphics and is the only package seen that allows you to draw curves easily. All you need to do is specify the two ends of the curve and then enter a positive or negative number depending on the direction and strength of the curve. Unfortunately this program was received too late for this review to cover it in depth. First impressions are that it is a very comprehensive drawing/graphic design program offering some of the facilities that other graphics packages are missing. Sound is a very important feature in any games program. With the Spectrum using the BEEP command in Basic, it's very difficult to get the sound you require. But with packages like Scope and Fifth it's possible to produce excellent arcade-type sounds. Auto-Sonics from Buttercraft Software allows you to create the sound effect of your choice and then the program gives you the Basic statement to produce your sound. Auto-Sonics has 26 pre-programmed sound effects, including sounds such as a frog, pig and telephone. An on-screen 'synthesizer' control panel allows you to modify any of the supplied sounds, or you can create your own. You can instantly hear the effect this has on any sound. The control panel allows you to control such settings as pitch - whether the sound rises or falls and the speed at which it does so. All alterations can be made by one key press, and all the necessary keys are shown on the screen. It must be remembered that the sounds produced by this program are all from the Basic BEEP function, and therefore are not as good as a machine code program such as Fifth. Nevertheless, the sounds that Auto-Sonics produces are reasonable, and the Basic statement produced can be put into any program. Auto-Sonics is an excellent program that allows you to create the sounds you want very easily. The above programs are only a small sample of the aids that a games programmer can buy. All of them have their good points and their rough edges. Before buying any package, consider the cost, and check that it will perform the functions you're after. You might find you need to use two programs, each offering similar facilities before you end up with the game that you require.
Bridge Software's Spectrographics allows you to define up to eight graphic characters on the screen at the same time.
Buttercrafts' on screen 'sound synthesizer' program gives finger tip control of the Spectrum's BEEP command.
Just move the sliders to create your own sounds for your latest game created with Games Designer.
Sprite number 0 from Halloween being designed with the 'alter sprites' option.
The first screen of Games Designer's Halloween.
The sprite table for the game Halloween supplied with Quicksilva's game designer program.
Advert17
- Sinclair User #35Feb 1985 · p.80
- Sinclair User #34Jan 1985 · p.22
- Your Computer #1Jan 1985 · p.200
- Sinclair User #33Dec 1984 · p.6
- Your Computer #12Dec 1984 · p.220
- ZX Computing #16Dec 1984 · p.80
- Sinclair User #32Nov 1984 · p.58
- Your Computer #11Nov 1984 · p.204
- ZX Computing #15Oct 1984 · p.67
- Sinclair User #30Sep 1984 · p.121
- Sinclair User #29Aug 1984 · p.85
- Sinclair User #28Jul 1984 · p.61
- Sinclair User #27Jun 1984 · p.55
- ZX Computing #13Jun 1984 · p.119
- Computer ChoiceJun 1984 · p.83
- Sinclair User #26May 1984 · p.107
- Your Computer #5May 1984 · p.201
Two-page ad11
- Your Computer #3Mar 1984 · p.212
- Sinclair User #24Mar 1984 · p.112
- ZX Computing #11Feb 1984 · p.132
- Sinclair User #23Feb 1984 · p.116
- Your Computer #1Jan 1984 · p.88
- Sinclair User #22Jan 1984 · p.8
- Sinclair Projects #7Dec 1983 · p.4
- Sinclair Programs #14Dec 1983 · p.68
- ZX Computing #10Dec 1983 · p.84
- Your Computer #12Dec 1983 · p.130
- Sinclair User #21Dec 1983 · p.62
Feature7
- ZX Computing #18Apr 1985 · p.101
- Your Spectrum #8Oct 1984 · p.36
- ZX Computing #15Oct 1984 · p.83
- Crash #4May 1984 · p.96
- Computer Answers #15Apr 1984 · p.27
- Sinclair User #25Apr 1984 · p.54
- Personal Computer Games #3Feb 1984 · p.15
Full-page ad4
- Sinclair Projects #10Jun 1984 · p.2
- Sinclair User #25Apr 1984 · p.45
- Sinclair Projects #9Apr 1984 · p.2
- Your Computer #4Apr 1984 · p.222
Review2
- Home Computing Weekly #52Mar 1984 · p.27
- Popular Computing Weekly #5Feb 1984 · p.57
Related
- Tags
- g198
- Elsewhere
- The Spectrum Show - Youtube
- Same entry at
- Spectrum ComputingZXInfo
Reviews from people here
Sign in to write about this, or make an account. It takes a minute and lets you correct the catalogue too.
No description recorded.
Sign in to correct or add to this.
Hold the rights to this and want it taken down?