CAD - Computer Aided Designer
Utility: Graphics · ZX-Spectrum 48K · 1 players · English
Dream Software Ltd · 1984 · Pound sterling 5.95
Discussion
Nobody has started a thread about this yet.
Play
- CAD-ComputerAidedDesigner.tzx.zipTape image English10 KB
Files and rights
No permission is on record either way. Screens and pictures are copied here on a take-down basis: if you hold the rights and want something removed, say so and it goes.
In the magazines 8
ZX Computing #22Dec 1985 · p.41
Colin Christmas
GRAPHICS '85 A comprehensive review of the state of the art by Colin Christmas. As we see this old year out and welcome the new one in, it's a better time than most to stand back and take stock. Looking back (and leaving the prophecies and predictions to others) it must surely be agreed that for Spectrum users with an eye on Graphics it has been a most exciting year. I can't speak for other departments but for me, it has been Christmas every issue. In this issue I want to do something special take a look at the goodies that have come our way. Our way? Who are We? We are the Graphics Grabbers, Artwork Addicts, Design Doodlers. For us the screen is a window on a world of colour, images, line, shape, pattern, design, texture, light and shade. And like a window it opens out into an exciting new visual world. For business, for profit, for learning for discovering or for pleasure. From the weekend dabbler or doodler to the serious professional, from the games enthusiast to the educational user, from beginner to experienced programmer and right across the age range, you will find Spectrum owners who are hooked on graphics. It's fairly formidable task - covering the range of Graphics Hardware and Software now available to Spectrum owners but let's get started. LIGHTPENS I've had most success to date, with the package from Dk'tronics. The pen itself is rather like a biro or felt tip pen. It is attached by a wire to a control interface which of course comes with the package. The interface is plugged into the back of the Spectrum. A program on cassette is included. The glass screen of your monitor is the working area and drawing surface, so some consideration has to be given as to whether this is the way you want to work. Then there are practical aspects such as the distance of your screen from your keyboard, and the fact that you have to work on a perpendicular 'face'. The height of the screen is therefore important if you do not want to suffer from muscle fatigue in your drawing arm. Lightpens give you a physical contact and interaction with your drawing surface if that is important. Calibrating the pen each time may prove a chore, but after that it's plainsailing - within the limitations of the power of the program. Again it's a good way of getting started or the very basics of graphics, of getting into the picture as it were. Sensibly introduced in the classroom it could be useful aid and introduction for children in an educational context. It is limited though in its potential for advanced or complex screen designs. Graphics Tablets give you similar physical point of con tact with your drawing-surface. This time it is horizontal and again a 'pen' is used. There's a review of the Saga Graphics Pad in this issue. So when you are ready look it up. They certainly take you further than the lightpen. But then you pay a lot more for the facilities they offer. Now for something almost completely different, the Sinclair LOGO pack. Another excellent starter, but as I have hinted, quite different. This pack has very obvious educational applications and for very young children. The founding father of the LOGO language intended it as a language for children which would develop logical thinking, introduce young minds to computer programming and have very definite terms of reference for the teaching and development of mathematical concepts. Drawing is achieved by moving a small graphics 'turtle' - a triangle - around the screen. This is done by sending through the computer commands known as Primitive Procedures (mostly single words and abbreviations of those words). Your sense of direction needs to be accurate and formulated mathematically. Once you have established procedures for drawing, say, a square, this group of procedures can be assigned a single word or name which LOGO will then understand as a command to repeat the whole set of procedures. The emphasis or bias is fundamentally mathematical, arithmetical or geometric. You do not just learn to draw a square, you also learn what makes a square what it is and from there the difference bet ween a square and a rectangle or a parallelogram. It is a language itself, apart from BASIC. Hence learning to use it is learning to program a computer in another language. The graphic aspect being displayed on the screen is part of the incentive and motivation for progressing with the new language. Two fairly weighty and comprehensive books or manuals are part of the pack. The first book deals exclusively with Turtle Graphics and is an absorbing and refreshingly different kind of programming experience. The second book acts as a reference manual for Sinclair LOGO, The growth, use and development of LOGO by Spectrum owners, especially in schools will, I think, be affected by the cost factor. When DREAM SOFTWARE released Computer Aided Designer, my own children had not had their Spectrum for long. They, like me were exploring the full graphics potential of the machine when C.A.D. turned up and kept us enthralled for days. Now, still an old favourite, I would recommend it as another in the 'Starter' category. With very obvious educational values and as a springboard for more ambitious projects later in Design. The manual is simple and very straightforward - alphabetically leading you through the twenty seven commands available in the program. Some forty custom shaped graphics, UDGs can be designed. By giving precise measurements most geometric shapes can be drawn, filled and so on. It remains impressive after all this time, and the potential for drawing in 3D is considerable. Similarly, another old favourite, VU-3D from PSION. This has the added and appeal of enabling the viewer to move around the object in 3D. Graphics and Design, pure and simple. High resolution colour and an incredible understanding of perspectives are real bonuses with this program. Future designers in the Aircraft or for that matter almost any other industry, may have started young with something like C.A.D. or VU-3D. I doubt if they would have been able to afford the RD Digital Tracer, from RD Laboratories. This is closer to an instrument than anything else I've come across in graphics and design hardware and software for the Spectrum. It comes in two versions, the Standard and the Professional. Both are fairly highly technical and sophisticated tools. The Tracer consists of a short fixed arm and pivot from which extends a drawing arm hinged at the centre with another floating pivot which moves across your drawing surface area. The arm is connected to the computer by a length of cable via an interface plugged into the rear port of the Spectrum. A cardboard template and transparent grid overlay are included for calibration purposes, the tracer is a precision instrument. The software cassette contains five programs. The usual options are offered in the first, plotting single points, construction of basic geometric figures, filling, hatching, change of ink, border, paper colour, adding text, UDGs and so on. The display image can be moved up, down, and from side to side, scaled up and down, and reversed. Multiple screen images including images at different scales and at different positions can be achieved. By adding other BASIC routines and software, the Tracer's capabilities can be extended into the field of statistical analysis. This immediately puts the Tracer into a specialist Graphics and Display category. Although the Tracer can be used with the ZX81 and 16K Spectrum, its full potential can only really be developed on the 48K and then only by competent programmers. It's a versatile instrument for the specialist. It's the season of Good will and all that, so why not give a last mention for all whose speciality is Games Designing. It's been around for a while, but standing the test of time in lots of ways. I'm referring of course to the High level User Friendly Realtime Games Designer from Melbourne House. Or as it is more commonly known, HURG. Still a powerful program and a very good manual. How did they do it in those all time greats like Pacman, Donkey Kong and Space invaders? H.U.R.G. will tell you how. It's a pretty good list of graphics goodies and that other seasonal expression comes to mind. 'There's something here for everyone.' You have no excuse for not knowing how and from whom in Spectrum Graphics, just how to enjoy the graphics power behind those buttons.
Your Spectrum #8Oct 1984 · p.40
Peter Freebrey
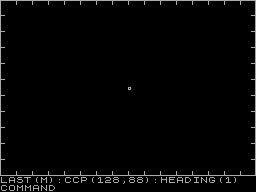
ART FOR ART'S SAKE There are many graphics toolkits available on the market, each claiming to give the Spectrum the commands it needs to become a 'true' artist. Peter Freebrey finds out if they left the drawing board too soon... Many of the programs now available for the Spectrum have quite amazing title pages and graphics within the program. But, wonder not, for with a fair amount of preparation and care, you too can produce similar effects. That's where graphics toolkits come in. They appear in a number of different guises, but the main reason for our interest is that they all cut down the level of work involved in creating a picture on the screen. They fall into one of two main kinds - those that enable you to draw lines, shapes, blocks of colour and dots anywhere on the screen, and those that provide a simple way of creating your own user-defined graphics; some of these toolkits provide both within the one package. Judging packages against one another is no easy task - because each of the better utilities offers something that the others don't. Either one has to wait for a package that includes all the facilities listed here (unlikely), or else you'll have to choose the one that offers what seems most suited to your present needs. In fact, there's a great deal to be said for having more than one toolkit; that way, with a little care, you can always SAVE from one and LOAD into another - perhaps to take advantage of a specially needed routine. 48K MELBOURNE DRAW Melbourne House £14.95 Although one or two graphics toolkits had appeared before this one was launched, none ever got the widespread publicity of this particular package. Melbourne Draw has now had well over a year to make its mark and it's gained the reputation of being a most effective utility. LOAD it and the program will auto-RUN and display the main menu. This offers several options enabling you to LOAD previously developed pictures or user-defined graphics (UDGs), edit a picture, and also to SAVE and VERIFY. Select 'edit picture' and you're presented with a black screen area - plus a two-line information window at the bottom of the screen. This tells you the current 'mode' (Skip, Set, Reset, Invert, Scroll or Text); you're also told whether you are editing 'screen' or 'attributes'. Below these are two numbers representing the x and y coordinates of the cursor. The numbering system used is identical to that of the Basic PLOT command, even allowing access to the bottom two lines of the screen (so that the bottom left corner coordinates are x=0, y=-16); should you wish to use these two lines, the information window can be moved to the top of the screen. During a Fill command, the window is removed to allow complete filling of any shapes within the window area. To the right of mode and co-ordinates is a four-character block, indicating the degree of magnification you are using. Finally, to the right of this is the section indicating the current INK, PAPER and attribute information. The first step is to clear the screen... that way you can see what you're doing! 'Clear' options (Paper, Ink, Both, Screen, All or None) are activated by Shift (either Caps or Symbol) and the 'R' key. Generally Melbourne Draw is pretty user friendly, although initially, with all the commands to remember, it may seem otherwise! But even then there is help because Melbourne has thoughtfully listed all the commands and their actions on the back cover of the instruction booklet... yes, it's definitely user friendly. Once you've cleared the screen you'll be left with a one-pixel flashing cursor that's roughly in the middle of the work area. This can be moved in any of eight directions using the block of keys under 'Q-W-E'. Pressing Enter will implement the Set mode and if you now move the cursor, a line will be drawn on the screen. Space activates Skip mode - no pixels set; the 'O' key lets you Reset pixels you've Set by mistake. Pressing the 'G' key puts a grid pattern over the screen, enabling you to align any shapes with attribute cells (you may wish to colour consecutive cells differently). The 'M' key magnifies your working image two times, and pressing 'M' again gives you another two-times magnification. This is particularly useful for fine detail and it's also very handy when you're designing UDGs. Melbourne Draw has the novel facility of allowing you to convert any character square (shown by the 'grid' pattern) to a UDG (normally restricted to the Spectrum allocation of keys 'a' to 'u'). Thus, at maximum magnification you have a display of eight by five cells showing. You can create a picture on it and conconvert 21 cells to UDGs, either for use elsewhere in your picture or for use within other programs. You're also given the data for each, should you want to record it for future use. The user can scroll the display in any direction and print text to any character square. The direction that the text is printed can be rotated; that means if you want a word reading down the screen with the letters on their sides, there's no awkward positioning to deal with. Just specify the direction in which text is to be written and key in your characters; UDGs can be dealt with in the same way. Finally, the display can be reversed left to right. Side two of the cassette has several Melbourne House title pages for you to LOAD, alter and otherwise play/learn from. PAINTBOX Print 'N' Plotter Products £9.95 LOAD Paintbox and it'll autoRUN to display the main menu. This serves up a choice of three options: UDG Editor, Precision Plotter and Screen Planner. Opt for UDG Editor and you're given a further menu which allows you to view existing UDGs, create new UDGs (using Paintbox's Drawing Board) or to go to Sketch Pad. Other options allow for LOAD or SAVE of UDGs from/to tape, the final one being to return to the main menu. Option 1 - View UDG Banks - displays four sets of UDGs already in memory; you can choose one of these for use with further options. The four banks are (a) a submarine, (b) a warship, (c) aircraft and (d) buildings, trees and vehicles. Also displayed are any UDGs you've already created using option 2 - Drawing Board. This gives you an eight by eight box within which to create your own UDG characters; you can call from one of the banks of UDGs, or you can call a keyboard character and alter that. Designs can be drawn using either the cursor keys or a Kempston Joystick. Once you ve opted to call a character to create or alter, there's no return... you must then create something, even if it's only a space; there's no way you can break out of this part of the program. Having produced your character, you're then given the opportunity of creating an inverse copy, a mirror image - or even of rotating it through 90 degree steps; whatever it is, just file the result in the bank of UDGs you're working with. There are four banks of 21 UDGs, so it's possible to create a total of 84 different graphic designs; the instructions tell you all you need to know about using banks of UDGs within your own Basic programs. The Sketch Pad option gives you a six by 30 cell (work area) together with a display of existing UDGs. Here you can try various combinations of UDGs (out of any bank of 21) to see what they look like; if you're planning to use several linked together, make sure they're in the same bank! The next selection from main menu is the Precision Plotter. You're given the choice of keyboard cursor keys or, again, the Kempston Joystick, and from there you can either start from a blank screen or LOAD a previous file from tape. First choose INK and PAPER colours - then the decision is yours whether to create a new picture, or return to one held in memory. The cursor keys give movement in four directions. Key 'Q' PLOTs a single pixel point and 'W' DRAWs a line from the end of a previous line or pixel point plotted; key 'E' will Erase the last command and 'F' will Fill with the current INK colour. Fill often misses out portions of the screen so you may have to recall it to fill in the 'holes'. Paintbox also supports Circle ('H') and Arc ('A'). INK colour can be changed at any time but PAPER has to be chosen at the time you first enter Precision Plotter. Over ('N') can be useful for correcting minor mistakes and there's a choice of cursor size - cross hairs for general use and a much smaller, single pixel, for precision work. Shift plus cursor keys moves the cursor at a much slower rate - again for fine, careful positioning. As on Melbourne Draw, the bottom two lines are used as an information window, showing the mode and x/y co-ordinates of the cursor. Here, however, the bottom two lines are not accessible. Should you return to the main menu and then back again to Precision Plotter, key '9' restores the current graphics screen to the display. This is stored in permanent memory, while the program is held in RAM, A COPY of the screen can be printed out on a ZX Printer and the display SAVEd to tape for LOADing later. Final option served up by the main menu is Screen Planner. This gives you the screen display created with Precision Plotter, together with the ability to call from any of the banks of UDGs. These are displayed on the screen with x and y co-ordinates (now for row and column) and INK and PAPER are available at any time; you can experiment with different attributes, although there doesn't appear to be any option to alter BRIGHT and FLASH at this point. Return to Precision Plotter (via the main menu) and you've now got your composite display to work on. The instruction booklet gives details of how to call on these SAVEd screens from various memory locations within your own programs. Remember, though, that each screen SAVEd under these conditions uses 6912 bytes. Print 'n' Plotter has a program - Screen Machine - that can save bytes on graphics screens; we'll be looking at that in a future issue. DRAWMASTER Campbell Systems £6.95 Campbell Systems is probably better known for its database and filing programs, but Drawmaster certainly offers a host of features. The program autoRUNs on LOADing to display a blank work screen with a two-line information window at the bottom (showing the current mode of the 'pen': Trans(parent), Draw, Erase or Over and the current attributes: BRIGHT, PAPER and INK (FLASH is not included - as is fairly obvious from the display). The x and y pixel co-ordinates are indicated in normal Spectrum fashion - that's 0,0 in the bottom left corner - and there's no way of using the bottom two lines of the display (which, of course, is the information window). Also shown are the current Line and Column (standard character cells) and pressing the 'Q' key gives what's called 'Menu' - in fact, a guide to which keys do what (a useful system of quick reference, and you can't lose it!). The direction of the 'pen' movement is controlled by keys '1' to '8', normal cursor directions and keys I to '4' are the diagonals. Caps Shift with one of these cursor keys moves the cursor eight pixels (in the Draw mode this would give you a dot every eight pixels) and allows rapid movement of the cursor. Key 'Z' gives fine control, with the cursor moving one pixel at a time (accompanied by a beep) and with the x and y co-ordinates being updated continuously. Other movement modes update the co-ordinates only when you stop. Drawmaster has several interesting features. You can define a particular point called 'X' (marks the spot - geddit?) on the screen and Draw lines or Arcs to it from any cursor position. You can draw from the cursor in any of the eight specified directions and they'll continue on until hitting another pixel - or, alternatively, the edge of the screen. The Window commands are also useful. They'll let you define a rectangular window, store this for future use, recall it, paint it with current PAPER colour, or re-define its position on the screen. Drawmaster can also Rescale any image and draw it elsewhere on the screen, either larger or smaller. In fact, the program's quick reference guide was obtained by copying normal Spectrum text and reducing it to 75 per cent of normal size. It's a time-consuming process, but one that greatly enhances the scope of the toolkit. To reduce or enlarge a portion of the screen - create a window around it, then use the Clear Window command to quickly erase the original once it's been copied. Text can be placed on the screen, but while in 'text' mode remember not to overwrite line 22 - the screen will scroll! Circles can be drawn at a specified radius about the cursor and, of course, there's the usual Fill command. The program allows screens to be SAVEd or LOADed to or from tape, but there are no user-defined graphics facilities available. COMPUTER AIDED DESIGNER Dream Software £5.95 Despite the 35-page booklet that accompanies CAD, there seems a notable lack of index or reference material to guide you swiftly through the functions and commands. To start with, it takes some searching just to discover (a) what it will do, and (b) how you do it. As usual, the program autoRUNs on LOADing at the same time showing the 'command' screen. The information window at the bottom displays the last command you gave, the current cursor position and the heading - the latter is selectable from a range of one to 16, and it defines the direction in which a line will be drawn .. .N, NNE, NE, ENE, E, and so on. For some unspecified reason, East is Heading 1, North is 13, South is 5 - not the most obvious of choices. To change direction, key 'H' and the word 'HEADING' will appear in the information window. Now press Enter to confirm that a change is in order, then key in the new number, followed by Enter; all rather long-winded and time-consuming. Most commands require a similar procedure. Jotter will plot (set) a pixel and here the cursor keys are used to guide your 'plot' (Shift plus keys '5' to '8'). However, to step over a pixel you have to key 'E' to end Jotter, press the 'K' key to enable cursor movement, move the cursor, and then key 'E' to end this command... ouch! The cursor provided is a very small square, consisting of one clear pixel at its centre. One might reasonably expect the clear pixel to represent the vital position from whence all can be drawn. Wrong! It's at the top left-hand corner!! CAD supports a number of useful design shapes: Cube, Circle, Facet (parallelogram), Rectangle, Square, Triangle and 3D Box. There's also an option to define the position of 26 ('A' to 'Z') points on the display of all or specific points, drawing lines between two or more points, shifting the cursor to a specified point and nominating 'automatic points' (where, for example, the corners of a subsequently drawn cube are automatically specified). If you reset (clear) all previous points - remember to 'display' points twice (first displays, then un-displays!) or you'll be left with unwanted letters all over the place. In addition to the design shapes provided above, there are routines that (a) allow the design of a shape from the display to be stored for future use and (b) UDBs (user-defined blocks), blocks of four character cells that can be created and used within your display. Both options can be SAVEd to tape - but only used thereafter with CAD. The second option, UDBs, provides a 24 by 24 grid on which to create your design. Cursor keys move the spot cursor and the Space key either 'sets' or 'resets' a cell... and continues to 'set'/'reset' cells to the right; this happens quickly and it's not particularly easy to act on one specified cell. Quick fingers and care are called for. But, a word of warning... a return to the main display screen ensures that all previous work is lost; remember to SAVE it first. Text can be placed on the screen and a Fill option fills a shape with the current INK colour. Erase removes the last command you made and Grid will display a 16-pixel grid pattern around the edge of the display area. Overall, CAD is an interesting program that's obviously been developed with specialist design work in mind; it's not a general purpose graphics toolkit.
CAD had most of the features I would expect to see in a decent package, with the exception of 'magnify'; you can play around on a large grid and then move your work onto the main screen, but once moved you can't then remove any mistakes that may have crept in. The screen shot here shows a user-defined block (UDB) of the star in the US flag; once defined, a UDB can be copied onto the screen as many times as required.
I was really pleased with the end result - certainly a lot better than I though the program deserved. The final flag may not be completely kosher, but the program proved too difficult to use with any accuracy in the time I'd allotted. The main problem with CAD was the cursor (spelt 'Kursor') commands. The process was slower than it could have been the cursor had to be redrawn every second.
On to the picture itself, and notice the liberal sprinkling of UDBs in the top left-hand corner of the flag. The easiest way I found of adding stripes to the flag was to fill the area in white INK and then paint red INK over the desired parts. I couldn't get the right number of stripes or stars exactly but, with time and careful planning, it's possible.
ZX Computing #14Aug 1984 · p.25
Colin Christmas
DESIGNS FOR LIVING Computer Aided Design - CAD - has come to the Spectrum. Colin Christmas reveals all... It's not an original prediction but I did reach it all on my own. It's simply this, that in the next few years there will be a rapidly increasing availability of Utilities and 'functional' hardware for home micro users like myself, and of Programs and Add-ons which can be used for educational purposes, for business, marketing, advertising and so on. Software and hardware which will soon put the small computer like the Spectrum alongside the text book and the audio visual aid on desks at home, in schools, colleges and the office of the small businessman. I did say it wasn't original and I know I'm not alone in reaching these conclusions. Other natives in the world of the home computer are becoming restless too. Playing games whether simulation, adventure or arcade poses the same problem as does taking sugar as part of our daily diet. We know we use too much. With that knowledge it's not difficult to cut down or to give it up altogether; "There's more to food and drink than the sugar, lad..." and there's more to a Spectrum or a ZX81 than games. Does anyone ask a Brain Surgeon to take out tonsils for the rest of his life? Does anyone spend hundreds of pounds on a camera to take holiday snaps? Surely the answer is, "Not if they've got any sense." What makes sense in this case of the Spectrum and computers like it is that we make the most of its' potential in the most 'user-friendly' ways. Two important areas being opened-up to home computer users now are to do with graphics and design, both vital to modern technology and industry. So much so that many Education authorities are now reorganising the traditional and separate basis of subjects like woodwork, technical drawing, art and craft. The new subject area is being called Craft, Design and Technology. It's an exciting development in educational terms. Teachers of this subject and amateurs like you and t know have access to materials once only available to those who could work with a main-frame Computer. If you're interested in graphics or design then I can recommend graphics pad, light pens and various 'draw' utilities to open up a new horizon for say the Spectrum. In particular, l can recommend the RD DIGITAL TRACER, from the range of equipment produced by RD Laboratories Ltd. This is one of many units enabling users to transfer information or images from paper to the TV screen. The least that can be said about such instruments and utilities is that they reveal and demonstrate the potential and capabilities of home computer colour graphics. There are two versions of the Digital Tracer. The Standard, (£55.50) and the Professional, (£75.50) the main difference as far as I can tell, is that while the Professional Tracer can be calibrated to work from an A3 size grid, the standard tracer can only cope with A4. A software cassette is supplied which contains 5 programs. The main program, with general purpose trace and draw features, plus 4 others, in BASIC and machine Code loaded automatically to the top of RAM. Programs 1 to 4 are suitable for both 16K and 48K machines and are recorded twice, once on each side of the tape. The 5th program is a composite on side one. You would get the same result by MERGING 2, 3, and 4 with the main program. This will only load on the 48K Spectrum. On side two, the 5th program is compiled from Programs 1, 2 and 3, and will load on the 16K. The Tracer can even be used with the ZX81 in a memory mapped code. The ZX81 programs appear as 2 printed listings in the instruction manual which comes with the kit. They will run on the 16 K ZX81 using POKE and PEEK to access the Tracer rather than IN and OUT. The first listing offers elementary drawing and printing facilities. The second provides recordings of coordinates for use in analytical programs. The Tracer itself consists of a short fixed arm and pivot from which extends the drawing arm which is hinged at the centre with a floating pivot joint. This gives a maximum working length of 250cm and an angular range of 0 to 110 Degrees. 0.9 metres of cable connects the arm to the machine via an interface with a 23 way edge connector which plugs easily into the rear port of the Spectrum. A cardboard template is supplied for positioning the tracing sheet correctly in relation to the arm. The arm has to be calibrated with the grid. After that you're away on your own. The manual is fairly clear and helpful, which is just as well because in order to get beyond the initial thrill of transferring outlines from paper to grid, you're going to need the manual for every next step. Border, Ink and Paper colours are easily changed. There's a choice of thick or thin lines too. Single points can be plotted and various common shapes - circles, straight lines, rectangles, semi-circles, right angles and so on, can all be simply and rapidly constructed by having to only define two points with the tracing heads. This is achieved by having access to a number of automatic routines. Complete outlines can be "painted in" or filled with any ink colour. There are two "hatching" effects at your fingertips at the same time. Text, graphics and UDG characters can be added to the screen display as normal, iNVERSE or FLASHing. Screens can then be saved on tape or copied on a printer. Previously drawn displays can also be loaded. And thus endeth only the main program. It's possible then to go on to achieve up and down movement of the display image, movement from side to side, images scaled up or scaled down, reversed left to right turned upside down or any chosen combination of these. As one might expect, the higher the magnification scale used, so resolution and accuracy suffer. Similarly scale reduction of the screen image will produce very fine and accurate detail. As if all this was not enough, it's possible to produce multiple screen images at different scalings and positions. Finally it is possible to create unique graphics characters which can also then be saved. The manual boasts that the unit can be used without any programming knowledge. This is true. However, more competent programmers are going to be able to go a lot further. The Tracer's capabilities can be extended by adding BASIC software, additional routines and so on. This way it is possible for graphical information to be used for statistical analysis by using the computer to process coordinates of images which have been transferred from originals. The only criticism of the manual concerns the kit for the Professional model of the Digital Tracer. The additional instructions necessary for the calibration of the tracer arm for the Professional should be incorporated properly in the manual itself and not merely included as a photocopied insert. The action of the Tracer Arm takes some getting used to as does the fact that rapid flowing movements, when achieved, do not transfer easily to the screen. All movements in fact have to be steady and deliberate. On top of this, it does seem at first to be expensive. With no pun intended, I think that the question of cost needs to be put into perspective and once in use in classrooms, laboratories and office, the Tracer will be the subject of speedy re-evaluation. One of the areas where it most certainly should have a use is in the introduction to, and then later, experimentation with the techniques of Computer Aided Design. Anyone involved professionally with Electronics, aircraft or vehicle design will have been familiar with this system for many years. But they used big computers to do it, and the whole approach was the province of the experts. This need no longer be true. And if the RD Digital Tracer seems altogether too daunting and the cost frightens you off, then I can recommend Computer Aided Designer for the 48K Spectrum from Dream Software, as one of several programs now available which will enable you to begin exploring the graphics potential of your machine, seriously and at a price you can afford. Designed to be user friendly for the beginner, compared to the Digital Tracer, (which would of course be rather unfair). Dream's package (Manual and cassette) can best be described as User Best - Friendly... It's a delight to use. Explanations and descriptions are kept short so that you can move quickly through the manual and familiarise yourself with the program. The program makes available 27 Commands and the manual takes you through them alphabetically, (thoughtful that!). The only way to do any kind of justice to this utility is to whizz through a few of them quickly. There are 5 options for designing custom shaped graphics - User Defined Blocks or Sprites. 40 can be constructed, each UDB being 24 by 24 pixels. Circles, parallelograms, rectangles, squares, triangles, can all be drawn to chosen sizes within the given Grid. 3D cubes and cuboids can be drawn automatically (calibrated in units of 16 pixels). Any shapes can be filled with colour. Paper and Ink colour can be changed at any time. The cursor square can be moved all over the grid using the cursor keys and should you find yourself in a corner, then the cursor square can be instantly centred. Straight lines can be drawn in 16 directions, 26 'User Points' can be assigned anywhere on the screen using letters A-Z and then you can trail lines through all or via selected numbers of them. Lines can be multiplied and joined to a point. Similarly 26 shapes, each containing up to 64 commands can be defined anywhere on the screen. And so on and so on... I have to confess to being grabbed by this utility. User friendly indeed. It takes only a short while to learn the 27 commands, and before you know it almost, you are engrossed in the experience as you enter the hitherto remote world of Computer Aided Design. All screens, sprites and designs can of course be dumped to tape We discovered that screens can also be loaded without first having to load C.A.D. by keying LOAD "" CODE 16384,6912. The potential for designing own title screens using C.A.D. is tremendous. Already much of this is kids stuff. And that's the point. It's getting difficult to keep up with them. Most start with Graph paper, designing screens, devising their own UDG's. Many have already discovered the disadvantages of trying to work on a 10 by 10 grid and companies like Computer Agencies Limited are now producing PIXEL PADS. These are large sheets of paper which contain several graphic aids, the largest part being a gridded screen representation, beneath which are several UDG squares. These squares are an 8 by 8 matrix and also, down the left hand side, the sheets have additional programming information necessary to get started, plus the facility to work in binary in order to enter the graphics as DATA statements. Not so very long ago, paper pen and ink took over from styluses and papyrus. I don't suppose anyone at the time considered it a dramatic development. It happened because the means was there. Later printing took over from the quill and the scroll. Felt tip pens joined crayons and coloured pencils. Each successive generation assimilates the facilities enjoyed by the previous generation with startling ease. It won't be long before using the techniques of Graphics and Design will occupy more of our time at home, in school and college when we sit down with our computers.
Crash #4May 1984 · p.96
REMBRANDT & CO Can't stand the penetrating smell of oil paints and terpentine? Are you drowning in diluted, diffused water colours? Forget about paint brushes, mixing pots and smeary dirty hands. The canvasses of the future are VDU or television screens and the crayons give way to flexible utility programs. Today the applications are limited by the lack of affordable colour screen printouts, but this is bound to change in the near future. Every artist will confirm that the selection of the right drawing utentils is of prime importance, and we therefore examine four drawing utilities now available to the budding Spectrum artist. C.A.D. from Dream Software Dynamic Graphics from Procom Melbourne Draw from Melbourne House Paintbox from Print'n'Plotter Graphical work on the screen may be subdivided into three main activities: Background and title screen creation Creation of user definable graphics (UDG) Handling of moving graphics (Sprites) The selection of the right utility depends entirely on the specific application. Not all utilities provide facilities for all three disciplines: each one excels in one of the tasks. SCREEN CREATION Screen creating can be a very time consuming job. The basics are simple: set or reset the 49'152 pixels which make up the screen and give the 768 attribute positions the required value. If you provide for every pixel a minimum of 10 seconds for setting or resetting, you will have to work non-stop for five days, 16 hours and 32 minutes. The colouring works out a fraction faster at two hours eight minutes. Obviously there are alleviating factors which reduce the required time enormously. Not all the screen has to be dealt with on a pixel resolution. Text and fill areas can be handled in character resolution. Nonetheless it is of prime importance that the utility provides an expedient and proficient way of performing screen functions without having to go through any lengthy function select procedures for a simple screen manipulation. Added facilities such as diagonal cursor controls, screen magnification, window creation, scrolling, etc, give the user extra flexibility and can prove a very useful bonus. Melbourne Draw scores the highest marks in user friendliness. This program provides the clearest logical procedure: screen and attribute handling are completely separated. The screen may at first be edited by positioning the cursor with the eight direction controls and then putting pen to paper for the actual drawing movement. The picture, including the usual edit area, can be created in 'black and white.' When satisfied the attribute edit mode is selected and the identical procedure can take place for the attribute character setting. Melbourne Draw is the only program which allows the attribute cursor to be moved in a non-destructive (pen up) mode. The colour may be selected by simply pressing the correct colour key (ink and cap shift paper). Melbourne Draw also provides a screen magnification facility, which can display a portion of the screen four or 16 times enlarged. This proves to be so useful that all the drawing is accomplished on the enlarged scale. The cursor position automatically dictates the screen area displayed and as a further bonus the entire screen may be pixel scrolled to centre the work area. There are no special draw functions such as circle, rectangle, etc, except fill. The text mode includes the useful option of writing text in any of four orientations (l/r, r/l, u/d, d/u). The program is aimed at providing a professional drawing board and proves to be a fast and efficient working tool for the serious user. Dynamic Graphics allows the creation of a window of any size, which may be positioned, edited and copied anywhere on the screen, thus providing for multiple screens or pattern generation within the screen. Further to this there is a rescale option, which will copy any rectangular area of the screen to any other part with different x and y scale. This can prove to be a very potent feature. Special draw commands such as line, circle and edit are also catered for. Although Dynamic Graphics is first and foremost a moving graphics utility. Its inbuilt screen creator proves to be an exceptionally versatile drawing instrument. Paintbox offers a Kempston cursor control option with its Precision Plotter screen editor. The inclusion of special draw functions such as fill, erase (last command), circle, radial mode and arc together with the option of including any of the 84 UDGs designed with the UDG editor provide for a useful screen tool. The omission of a paper colour control within the screen editor forces the user to go through the lengthy procedure of returning to the main menu for the sake of changing paper colour. The list of options in the C.A.D. program suggest a very powerful drawing tool. However the basic command procedure of C.A.D, proves to be a stumbling block. Every function is called by pressing the appropriate command key, upon which the selected command is displayed in the information window. The user must then press enter for execution. This is even required for positioning the cursor. This all makes for a lengthy procedure, which ultimately takes the fun out of drawing. Apart from the usual cursor control there is the option of using memorised headings, but in practice it is very difficult to make good use of it. The shape creation function, which allows the user to stoe and recall a sequence of drawing commands, proves to be very useful for pattern generation or similar applications. C.A.D. has a complete set of special draw commands, which include among other things triangle, 3D cube and 3D rectangle generation. UDG CREATION Paintbox offers a complete service for UDG addicts. The program caters for four banks of 21 UDGs which can be called into the UDG area for access. The edit facility is complete and practical to use including inverse, rotating and mirror functions. The UDGs are stored together with a M/C routine for calling the individual banks from Basic into the UDG area. A sketchpad is provided for experimenting with related UDGs (multi-character sprites). C.A.D. offers a less elaborate UDG facility. Up to 26 UDGs may be edited and stored. Melbourne Draw has no special editing facility for UDGs but editing is accomplished anywhere on screen using the x16 magnification mode. Any of the 760 character positions on the screen may be assigned as any one of the 22 UDGs. Pixel scrolling may position the required shape within the character grid. MOVING GRAPHICS Dynamic Graphics is the only program to actually handle sprites and sprite movement from within a user's Basic program. C.A.D. caters for the creation of up to 40 24x24 pixel sprites (3x3 character), but leaves it to the user to inject any life into the screen. It does not provide any M/C routine for fast pixel to pixel movement. Dynamic Graphics provides the user with a complete sprite animation facility and must be invaluable for the programmer who doesn't want to delve into the machine code labyrinth but requires smooth animation. Six sprites of up to 4x4 characters may be generated and edited with the excellent sprite creator. The six graphic characters are treated as individual frames of an animated film and the user may test the resulting motion by selecting the animated display, which sequences the frames on display to create a living object. The character set may then be saved to tape to be called up for later use. To integrate the moving sprites without any knowledge of M/C, a sprite user subroutine compiler is provided, which creates a sprite positioning subroutine anywhere in normal user memory. This subroutine can be accessed via Randomize User commands from within Basic. Up to 10 different frames may be positioned consecutively on the screen and the result (if handled correctly) is a very smoothly moving object. CONCLUSION The four programs under scrutiny all have their individual merits. Melbourne Draw stands out clearly as a professional tool for title and background screen creations. Paint box provides the most flexible UDG creator combined with a useful screen editor. Dynamic Graphics is a must for anybody wishing to create moving graphics within their own programs without bothering about M/C handling. C.A.D. provides a multitude of different facilities for screen, UDG and sprite editing. THE PROS AND CONS C.A.D. Plus: - Multitude of special draw functions: Line, rectangle, square, triangle, circle, parallelogram, 3D cube, 3D rectangular box, fill, erase (last command). - Grid display on edge of screen. - Assignment of (A-Z) letter labels to 26 points anywhere on screen for 'Draw by letters' facility. - Shape creation: 26 preprogrammable user commands will perform a series of draw commands (= draw routines). - Sprite generation: up to 40 3x3 character sprites. - Sprite generation of up to 40 3x3 character sprites Minus: - Complicated and slow drawing procedure (select command and press enter). - Confusing and unpractical heading facility (cursor or preset heading). DYNAMIC GRAPHICS Plus: - Two cursor speeds. - Special draw functions: Line, circle, arc, fill. - Window creation with full edit and positioning facilities. - Rescale of rectangular area anywhere on screen. - Excellent sprite creation 4x4 character sprite edit facility including animation experimenting. - Sprite user subroutine compiler: Creates relocatable M/C routine for handling up to 10 frame 4x4 moving characters from within Basic. Minus: - No grid overlay for screen creation. - Complicated cursor direction controls. MELBOURNE DRAW Plus: - Separate screen and attribute editing. - Attribute skip (pen up) mode. - Diagonal cursor movement. - Magnification x4 and x16 of screen sections. - Fast screen handling. - Grid overlay using Bright facility. - Pixel scrolling of entire screen with wrap around. - Text can be written in four orientations. - Reducing and enlarging of entire screen. - Simple UDG creation of any character on screen. - Full screen available for drawing (information window relocatable). Minus: - Complicated fast cursor movement. - No special draw commands except fill. PAINTBOX Plus: - Two cursor speeds. - Kempston cursor control option. - Special draw facilities: Fill, erase, circle, radial mode arc. - Excellent UDO creation: four banks of 21 UDGs full UDG edit and handling facility from within Basic. - Combined screen and UDG facility (Screen Planner). - Sketchpad for related UDG display during UDG edit. Minus: - Long-winded paper colour select.
Above: Sprite animation avoids delving into machine code in Dynamic Graphics.
Below Left: A boat made from Paintbox's bits and pieces.
Below Left: Zooming in on Smaug and showing Melbourne Draw's mirror image facility.
Below: UDG addicts are catered for in Paintbox.
Left Top: Smaug from The Hobbit with a purple eye.
Left: C.A.D.'s special draw commands include 3D cubes and rectangles.
Lower Right: The title screen of The Hobbit as it should really be.
Right Top: A zoomed in close-up from Terror-Dactyl 4D.
Right: A Ferrari from Paintbox.
Top: A good example of Melbourne Draw's excellent magnification facility.
Feature4
- ZX Computing #22Dec 1985 · p.40
- Your Spectrum #8Oct 1984 · p.36
- ZX Computing #14Aug 1984 · p.25
- Crash #4May 1984 · p.96
Reviews from people here
Sign in to write about this, or make an account. It takes a minute and lets you correct the catalogue too.
No credit, description, tag recorded.
Sign in to correct or add to this.
Hold the rights to this and want it taken down?